Add Label
This function adds a label to the caller passing through this IVR function, making it possible to route the caller based on that label, as follows:
- If the contact isn't saved in the database, this function will automatically create a contact record in the Contacts database and associate the specified label.
- If the contact already has this label associated, it won't make any changes.
- If the contact has a different label associated with their contact info, it will add the new label alongside the existing one.
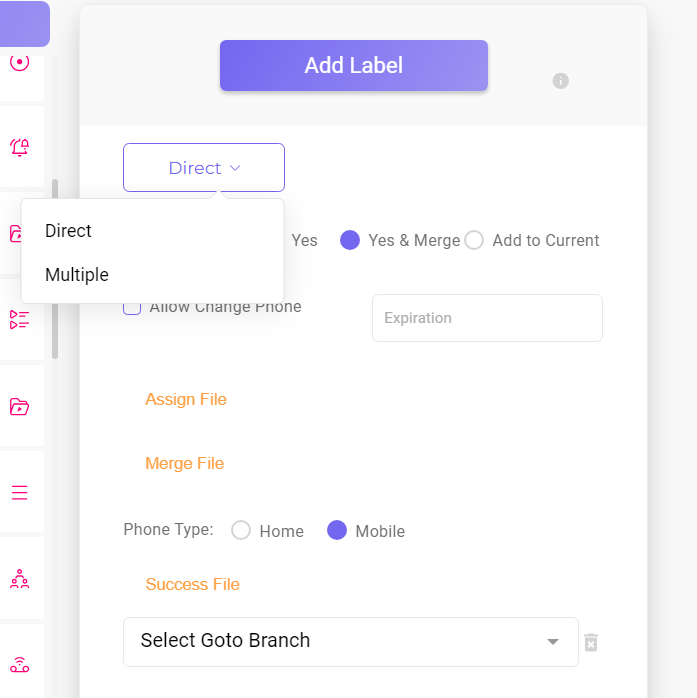
There are two types of 'add label' functions:
- Direct: Adds a single label.
- Multiple: Provides a menu of label options to choose from, essentially grouping multiple direct functions under a label menu.
Let's take a closer look at each function:
Direct
If a caller's number is not yet saved in the system under the Contacts database, here's what happens when you select each of the following radio buttons:
- "No": The system will not add the caller's information to an existing record. Instead, it will create a brand new contact record.
- "Yes": The system will search for an existing caller record based on the provided phone number and add the caller's phone number to the associated record.
- Any label already associated with the existing contact will also apply to the newly added phone number.
- "Yes & Merge": With this option, the caller's phone number is already in the system and the new label will be added to the associated contact record, plus, the system will allow the caller to merge the contact record with an additional existing caller record.
- "Add to current": Adds the label to the caller's calling ID and enables them to include an additional phone number associated with the same label.
- This process is effective under the following route:
- Add Label branch with 'Add to another' set to "No" and 'Go to Branch' directed to the second Add Label function.
- Second Add Label branch with 'Add to another' set to "Add to current." The second Add Label IVR function, set to "Add to current," combines the new phone number with the prior Add Label branch, linking the label with the same contact. This instructs the system to use the same label as the previous Add Label branch in the route.
- "Allow Change Phone Number" Checkbox:
- When checked, callers can choose the phone number they want the system to recognize them with.
- If this option is selected, please add a greeting or recording instructing callers to enter their phone number (e.g., "Please enter your phone number"). You can use the "Assign File" and "Merge File" buttons to select the appropriate recording for prompting callers to add their phone number.
- When unchecked, the system will use the caller's current ID, the one they used to make the call.
- When checked, callers can choose the phone number they want the system to recognize them with.
- "Phone Type" Radio Button: Callers will be prompted to enter the specified phone type as set here, ensuring accurate categorization.
- For example, if the end goal is to send SMS messages, the system will guide the caller to specify a "Mobile" phone number for that purpose.
- To establish different routes based on phone type, create separate Add Label branches for each type, allowing you to route the caller accordingly.
- "Expiration" Field: Enter the number of days until the contact, to which the label is added, expires.
- "Success File" Button: Click to choose an album and a specific recording to play to the caller upon successful completion of this step. If no recording is selected, the system will proceed to the next step in the route.
- "Goto Branch" Drop-down: Choose the next branch that the caller will be directed to after this one.
Multiple
- In the top left drop-down menu, select "Multiple."
- Use the "+Add" button on the top right to create 'Add label' menu options.
- For each option, specify the input that a caller should enter to access this 'add label' option. Then, select the corresponding label from the "Select Label" drop-down menu for that input.
- If needed, check the "Allow Change Phone" checkbox – refer to "Add Label - Direct" for more details on how it works.
- To delete an 'Add label' menu option, click the trashcan icon on the right.