Contacts
On this page, you can manage your contacts and create labels. Think of labels as tags or folders for your contacts, which help the system route calls based on the assigned labels.
Manage Labels
Follow these steps to create and manage labels:
- Click the left purple button.
- Enter the label name and number, then click "Save.
Similar to IVR branches, you can also search for specific labels, sort them, edit by clicking the pencil icon, select one or two for deletion, and set an expiration date per label.
Create Contacts
After creating labels, you can proceed and create contacts:
- Click the right purple button labeled "+Add Contacts" to open a sliding panel where you can input contact details, including Name, Phone Number, Email, and more.
- The only mandatory field is a 10-digit phone number without special characters.
- Within the "Phones" section, you can add multiple phone numbers and specify their type (defaulted to Home or Mobile) by clicking the "Add" button on the top right.
- Be sure to select a label from the "Select Labels" drop-down menu, aiding in categorizing contacts for easy sorting and retrieval.
- Utilize the "Notes" section for free-form notes to reference in the future.
- For advanced information, such as passwords or PIN numbers, use Custom fields (A-J) to store data that the system can access.
- Set an expiration date for the contact from the provided drop-down menu. When a contact expires, their information remains stored, but they won't have access to protected content.
- 🆕 Call Center: This is an advance feature, reach out to support@voitex.com to learn more.
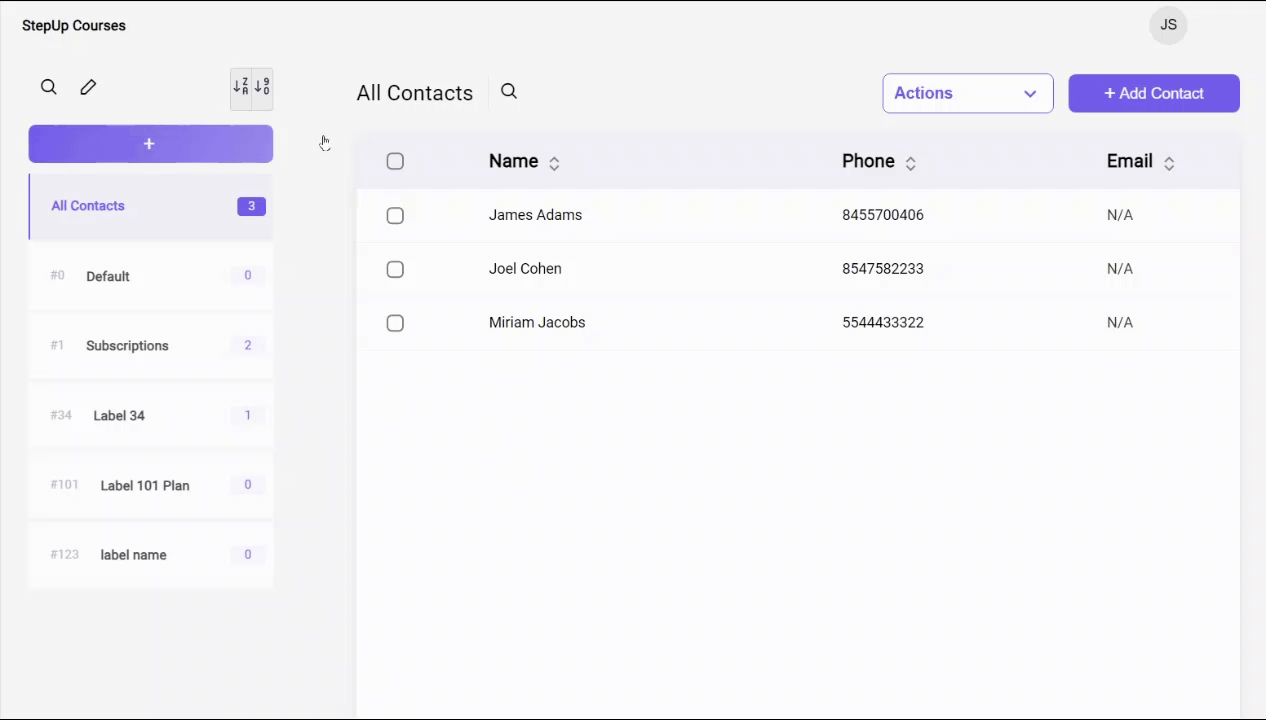
View and Manage Contacts
Once a contact is created, you'll see a summary of their high-level information in the table view, including their First and Last name, phone number, and Email.
- To access the complete contact information card, simply click on the corresponding entry in the table.
- To search for a specific contact, click the magnifying glass icon at the top and enter your search query.
- To sort the contact order, click on the table column header.
Importing and Exporting Contacts
You can easily import and export contacts using the top-right action drop-down button:
Import
- Select the label(s) for the imported contacts.
- Upload a plain text Excel sheet using the "Upload File" button. Ensure it's free from formatting like styling and borders.
- Note that phone numbers must be in column C; other columns are not critical.
- Click "Import" to complete the process.
Import Custom
Here, you can specify what each column represents. For example, if the first column is for "First Name," make sure it's labeled as such at the top, and do the same for other columns.
- To enable the import, you need to:
- Select label(s) from the label drop-down list.
- Arrange the columns by dragging the column chips from left to right to match your sheet's order.
- select update checkbox - if you already have the contact's phone number stored in your database, it'll update them with the newly imported information
- once update checkbox is selected, you have the option to select update blank - means that if there's an existing contact with the same imported phone number, when this option is checked, it'll delete all previously saved contact info that the new important does not contain (please be extra careful to ensure the right information isn't deleted mistakenly)
- save as default - if checked, it'll save the column order selection for future imports — the non-custom ones will essentially become the custom import template you've created here
- upload file button - select the locally saved excel sheet of your contacts you've prepared
- click the import button once you're done
- Export - will export in CVS format the existing contacts
- Export Custom - select the way you wish the contact info to be exported. If you wish the first column to include the First Name, make sure the first name chip is dragged to the right first, and so on. And then click the export button.
Edit Contacts
- To edit a single contact, you could do so by clicking into it and updating the information in the sliding panel.
- To edit a few contacts at the time, select the appropriate contacts by checking off their checkboxes on the left, and hit the Actions drop-down button on the top right, and select one of the following actions:
- Add Label - will allow to add a label to one or several contacts at the time.
- Remove Label - will remove a label from one or several contacts at the time.
- Delete - will delete one or more contacts at the time
Notify Contacts
The Notify feature allows you to specify contacts to be notified via text or call. The call notification can direct the contacts to a specific IVR branch for a more detailed path.
- Use Case 1: Companies can send a call or text to clients and route them to a label branch after call notification, confirming who received the notification. This helps track message delivery efficiently.
- Use Case 2: For taxi services, Notify can inform clients about their ride details (driver's name, plate number, etc.) through a call or text by routing them to an API branch that retrieves and plays all relevant information to the client.

SMS Notification