Voitex Portal: The Complete Guide
Welcome to the new and improved Voitex portal! We're excited to introduce you to a significantly enhanced user experience designed to streamline your interactions with our platform. This guide is crafted to get you started efficiently while prioritizing the essentials.
If you have suggestions regarding portal features, please email us at idea@voitex.com. For questions and support, contact us at support@voitex.com.
IN THIS ARTICLE
- Getting Started
- Account Management (Profile, Billing, User Management)
- Dashboard
- IVR Branch
- SMS Branch
- Contacts
- Broadcasts
- Conference
- Call Center
- Library
- Phone System
- Merchant
- Live
- Logs
- Settings
- Additional Resources
- FAQs
- Voitex Policies
Getting Started
Overview
Your account interface is designed for easy navigation, featuring a left-side menu for quick access to various sections. As you explore, notice that the content on the right dynamically updates based on your selections. Upon logging in, you'll land on the 'Dashboard,' offering a snapshot of your account with key information readily available.
But first, how to log in?
Account Login
- Navigate to the Login Screen:
- Click here (https://portal.voitex.com/login) to access the login screen.
- Alternatively, type or copy and paste the URL into your browser.
- Login to Your Account:
- Enter your username (email address) and password in the right fields.
- Forgot Password?
- If you forgot your password, click the "Forgot Password?" option located above the login button to reset your password.
Account Management
Profile
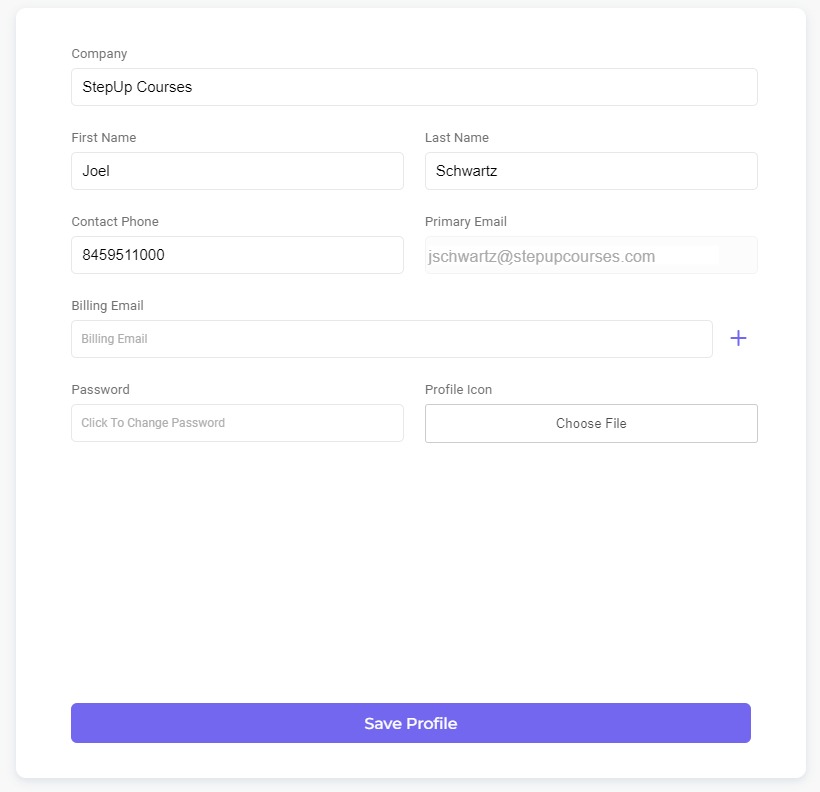
Manage your profile by clicking your name at the top right corner and selecting the 'Profile' option. You will be able to view and edit your:
- Company name
- Contact information (name, email, billing email(s), and phone number)
- Password
- Profile icon (which will be visible in the portal banner as well as your podcast album, if applicable)
Billing Information
Manage your billing information by clicking on your name at the top right corner and selecting the 'Billing' option to:
- View your plan and pricing.
- View your account balance.
- Process payments.
- View the minutes used per month (applicable for per-minute plan).
- Add and update your payment method.
- View and download past invoices and their statuses.
- View and download transaction history.
Explore the detailed actions by following the steps below (each step corresponds to the numbered elements in the screenshot below):

- "+Add Payment" button: Click to process payments, enter the desired payment amount and select your preferred saved payment option from the dropdown.
- "Payment Methods" button: To add a payment method, click "Payment Methods" and then select "+Add Payment Method" from the top right. Enter your credit card details, save the information, and, if needed, set it as your default payment method by toggling the "Default" option before saving.
- "PDF" icon: Click to view an invoice situated to the right of the desired invoice under the Invoices section.
- "Credit Card" Icon: To manually process payment for a specific invoice (after the 7th of the month), click the "Credit Card" icon located under the "Action" column, following the same steps described in step #1 above.
- "Invoices See All>" button: Click to view all invoices in the top right corner of the Invoices section. Here, you can view, process, and filter invoices. Use the filter drop-down in the top right corner to select your preferred category (All, Paid, Unpaid) and click "Filter." To clear the filter and view all invoices, click "Clear."
- "Transactions See All>" button: Click to access all transactions at the top right corner of the Transactions section. From here, you can view all transactions and export a transaction report by clicking the export icon in the top right corner.
User Management
Use this page to view and manage your account's sub-users and to generate new sub-user accounts. Unlike Admins, sub-users do not possess access to transactional details, such as credit card information or invoices; their access is determined by the settings established by the admin on this page.
The main view provides information about your sub-users, including their first and last names, email addresses, and actions (options to edit or delete a user), along with the option to search.
- To create a new user, click the "+Add User" button and input the required information in the right-side panel, which includes:
- First and Last name
- Email address (Required)
- Login Password (initially set by you, but it's recommended for sub-users to reset and set their own).
- Permission section: By default, sub-users have access to all Albums, Labels, Conference Rooms, Voicemails, and Campaigns. If you wish to restrict access, select "Specific" from the right drop-down and specify the items the user should have access to.
- Set Page Permissions: Click the button and check the appropriate checkboxes for the modules you want your sub-users to access through their portal account. If not enabled, the user won't have access to any portal modules.
Please keep in mind that for your sub-users to access any portal module, you must configure their permissions in the Set Page Permissions box accordingly.
Dashboard
When you log into your account, you'll see the dashboard—a quick summary of your account, featuring:

- Hotile Numbers: View on the left side of the screen your hotline numbers that customers use to call in. For each number, see the graph to see the highest number of calls happening at the same time (concurrent calls) and the total number of calls over the past 7 days.
- Limit & Usage: Check the top right corner for a summary of your current usage against the allowed limits for channels, library branches, albums, and storage. Today’s usage information is shown by default, but you can select a different date using the date picker above the summary breakdown to view data from another day.
- Public Albums: Below the Limit & Usage section, you can find your account's public albums. Here, you can see a list of albums. For each album, click to access the public link that allows listeners to view and listen to the album content. As an admin, you could also access the admin link to manage each album, including tasks like uploading and deleting album recordings. Click ‘See All’ to be redirected to the Album page with a list of all your albums.
Note: If you can't view your albums on the dashboard, make sure they're set to 'Public.' Go to your Library, select the desired album, click the edit pencil icon, and in the 'Other' section at the bottom right, check the 'Public' checkbox.
- Voicemails: Located beneath the Public Albums section, you'll find a listing of your voicemail boxes along with a summary of the new and read voicemail counts. For a comprehensive view of all voicemails, simply click on the title or the "View All" link below.
IVR Branch
Overview
IVR (Interactive Voice Response) presents your callers with a series of options or choices through recorded menus or prompts. Each option represents a branch and based on the caller's selection, the system determines subsequent action or information the caller receives. The caller is essentially navigating through the IVR tree of options by responding or using their phone's keypad.
Note: Don't forget to click the purple check box at the bottom right to save your changes.
Page Structure
Navigate to the IVR Branch page to manage how your callers go through your IVR branch paths.
The IVR Branch page includes 4 columns, as follows:

- Column #1: Create a new branch and view your list of branches.
- To create a new branch, click the + purple button and input the new branch’s Number, Title, and Function/type from the Function drop-down list (see IVR Functions section to learn more).
- To configure a branch, click the desired option from the branch list and view/edit its settings in the middle column (#2) on the right.
- To delete a branch, click the pencil edit icon above the list of branches, choose the branch you wish to delete by checking its respective checkbox, and then click the "Delete" button.
- 🆕You can now delete multiple branches simultaneously by selecting their respective checkboxes and clicking the "Delete" button once.

- To find a specific branch, click the magnifying glass icon above the list of branches, enter the branch information (number, function, or name) to find a specific branch, and the list will automatically update to include matches.
-
To sort the list of branches alphabetically or numerically, click on the arrow symbols above the list of branches.
- Column #2: View and configure branch setup.
In this section, you define the actions in each branch. Keep in mind that the appearance of this tab changes according to the selected IVR Function, as each Function provides unique customization options.
- To edit the branch type, click the purple button and select a different type from the drop-down options.
- Below the branch type purple button, you'll be able to configure the branch details when applicable. Every IVR branch has its own set of settings.

- Column #3: Add and manage branch recordings.
- To add a recording your callers will hear as soon as they land on the select branch, click the + purple button and follow one of the following options:
- Add Recording: Click this option to select a pre-recorded album from your "Library" module.
- Add TTS: Use the TTS (Text-to-Speech) feature by entering the text you wish to convert to speech.
Note: Several IVR Functions, including those that are 'Multiple,' require greeting recording. These functions include:
- Menu
- Password
- Custom Input
- Multiple function type (such as Album Collection, Add Label, Connect, etc.)
- Arrange the order of recordings by long-clicking the drag icon button on the top right of each recording and dragging it to the desired position. The order of your recording playback starts with the top recording playing first.
- Column #4: Configure IVR Branch Settings.
In this section, customize the functionality of the selected IVR branch. Specify the number of times the branch recording will repeat, the wait time for caller input, and actions in case of a 'no-route' status and invalid caller inputs. The following breakdown outlines the available settings, including the system's default configuration:
| Settings | Available Settings | Default Settings |
| Repeat | Enter in the "Repeat" field the desired number (0 or more) of repetitions for the IVR recording if the caller does nothing. | 3 (3 times): The IVR branch recording will play 3 times. |
| Wait | Enter in the "Wait" field the desired number of seconds (0 or more) that the IVR branch will wait for caller input. | 3 (3 seconds): After the IVR branch recording completes, it'll wait 3 seconds for the caller's input. |
| No-Route |
Set what happens with the call when the IVR branch is at a 'no-route' status, including:
|
Hangup: Hang up the call if the IVR branch encounters a 'no-route' status. |
| Invalid |
Set what happens with the call when the caller inputs an invalid option, including:
|
Choose option: There is no default setup for invalid input. Select an option to define the system's response when the caller inputs an invalid option. |

|

|
IVR Functions Overview
Our system provides a variety of IVR functions, ranging from basic to advanced hotline requirements, organized into these groups:
| Group | Plug-and-Play Functions | Admin Functions | Advanced Custom Functions | Developer Functions |
| Description | Ready-to-use IVR functions for common hotline needs. | Account management and report retrieval by phone, bypassing the need for portal access. | Tailored IVR solutions to meet specific requirements. | Advanced tools for customization and integration with developer-level control. |
| Functions |
|
While your portal features a different order of IVR Functions, in this guide, we'll begin by discussing the first group, which includes the most basic and commonly used features. After that, we'll cover the other groups of functions.
Plug-and-Play Functions
Album Collection | Menu | Record | Pay | Voicemail | Label | Add Label | Remove Label | Conference | Connect | Custom Input | Modify Audio | Listen VM | Bookmark | Playlist | Dial | Transfer To Number | Auto Rotate | Day Of Week | Switch Timer | Password
Album Collection
If you wish your callers to listen to an album(s) when they enter this branch, use this function.
Note: Set this function as the default landing box if your hotline primarily involves listening to album collections (courses, classes, etc.). Otherwise, choose 'Menu' as the default landing box option. Please be aware that this branch comes with usage limits and should be employed only when necessary.
Select the album type, Multiple or Direct, from the left-hand dropdown. Choose:
- "Direct" if you wish callers to hear a specific album without their input.
- "Multiple" (default) if you want callers to listen to several albums based on their input. This option is a quicker way to handle multiple albums, rather than setting up separate menu IVRs for each input that would direct them to specific album options.

For "Multiple" IVR Album Branch: Click the +Add button on the right to add an input and its settings. To set an album for each input:
- Click the "Set Album" button on the left-hand side.
- Choose the appropriate album from the dropdown list of previously created albums.
- In the left field, enter the input that callers should use to access the assigned album.
- To remove an input, simply click the trash can icon on the right.
- Choose the album type from the dropdown menu to determine how your callers hear the assigned album, as follows:
| Album Type | Description | Settings |
| Choose Specific (default) | Allows callers to select specific recordings from the assigned album based on their input. Ensure that the recordings in the assigned album (under the Library module) match the available input options (e.g., Press '1' to hear class A, press '2' to hear class B, etc.). This option is most suitable for accounts that provide classes/courses, etc. |
To continue playing the remaining album recordings, check the "Continue" box and specify the playback order:
|
| Play Album (most popular) | In this option, you will select a specific album for callers to listen to. Callers won't have the ability to choose specific recordings, instead, the album will play all its recordings based on how the album is set under Library. |
|
| Play Last (Sort Number) | Similar to the 'Play Album' option but plays only the latest recording and nothing more. It's especially useful for accounts that share current information that becomes outdated once the next recording is available (such as sponsorship details, snow updates, daily promotions, etc.). |
|
| Goto Branch | Directs callers to a different branch, primarily used for routing to functions that are not accessible within the Album Collection IVR. |
|
| Record | The 'Record' feature allows callers to record their input to the assigned album instead of listening to one. This feature can also be used by admins to record over the phone branch greetings, content, and more. |
|
| Conference | Direct callers to a conference room where they can participate in a live session via phone. |
|
| Assign Direct | Enable callers to listen to a single recording as soon as they enter the prompt. This option is typically used for demos, system instructions, etc. |
|
| Voicemail | Allows callers to leave messages on the hotline for later review by admins. |
|
| Shuffle | This function will mix up the sequence of recordings and callers will listen to album recordings in a random order. |
|
Record vs. Voicemail:
- Use 'Record' to add content to albums automatically for callers to listen to.
- 'Voicemail' is for admin listening with extra features. Voicemail-to-album requires manual download and upload.
Menu
This function is used to present your callers with a series of options, each representing a branch. Based on the caller's selection, the system determines the subsequent action or information your caller will receive.
- Each row includes an Input field and to its right the available IVR branches drop-down.
- Enter the right digit in the input field and determine the IVR branch the caller will be routed to when they enter the configured digit.
- Click the +Add button to add as many Menu inputs as you'd like.
Note:
- The system will only accept the digits that you list in the ‘Input’ field.
- Set the menu input as a single digit whenever possible. Otherwise, the system may expect additional input and cause delays.
- This function is normally used as the Welcome branch, in other words, callers are greeted with this Menu branch when they call in.

Record
Save to albums callers' recorded content— including instructions, classes, courses, etc. Select the right record action in the action drop-down, as follows:
- Self: For a single standard recording action.
- Continue: Used in a series of recordings and marks to the system to compile all recording units into a single long recording. Mainly used for Survey questions, self-assessment, etc.
- Final: Used at the end of a series of Record-Continue branches to mark the completion of the recording sequence.
- Note: The Recording-Final branch should not include a recording.
Example of a Survey Recording branch flow:
[Record-Continue] —> [Record-Continue] —> .... —> [Record-Final]
"Self" option features overview:

- Allow Album: When checked, callers can pick the album for their recording. The "Allow album" checkbox is typically checked to enable Admins to record content via phone and assign it to the appropriate album. Otherwise, Admins will specify the destination album for their callers' recording by selecting the right album from the "Select Album" dropdown.
- Allow Sort: This feature relates to the Sort Number (Recording Number) within an album. Choose from the following options:
- Yes: Admins can manually select the sort number.
- No (default): Sort number assigned automatically.
- Play Sort: Sort number assigned automatically and played back to the caller, primarily for Admins' reference
- Select Album: This drop-down is visible when 'Allow Sort' is set to 'No.' In this mode, callers cannot assign an album to their recordings; instead, an admin must choose the album where the recording will be added automatically.
- Require Verification: Check this option if you wish the admin to vet each recording before it's published to the assigned album.
- Auto Save (Checkbox): When selected, the recording will save automatically without requiring any manual input (as described above).
- Email Notification: If an email address is provided in the "Email" field, the admin will receive an email notification containing the new recording details (excluding the actual recording).
- To ensure this feature functions correctly, make sure to enable Record Notifications in your Alerts preferences under Settings.
Pay
- Action: Choose the appropriate Pay action from the options below:
| Pay Action | When to Use |
| Amount & Checkout | Guides callers through the payment process, including determining the amount and completing checkout. |
| Amount |
Use this action to determine the payment amount.
|
| Checkout |
This branch action finalizes the caller's purchase.
|
| Recurring |
Choose this option to automatically charge the caller's credit card on a recurring basis.
|
| Cash |
Choose this action to log a cash amount received.
|
The page fields adapt based on the selected Pay action from the drop-down menu. Below, you'll find the available fields for the "Amount & Checkout" selection. All the other options involve components from the Checkout & Payment fields, except for "Recurring.":
- Amount: Enter the desired payment/donation amount. If left blank, callers can set their own amount.
- Ask Phone Number (Checkbox): When checked, callers must provide their phone number, which will be saved along with their payment information.
- Record Message (Required/Optional/Not Required): Choose whether callers can add a recording to their payment immediately after a successful transaction and before the call ends.
- 🆕Input Playback: Choose the language for the system's playback of payment details: English (default) or Yiddish.
- Play Confirmation (Checkbox): When checked, the system will provide payment confirmation, including a confirmation number.
- If callers are required to be routed to another branch after making the payment but before completing the call, deselect this option to prevent call completion.
- Keep in mind that choosing this option will result in the loss of the confirmation number.
- Monthly Subscription (Checkbox): When checked, it functions similarly to a recurring payment, but without the ability to specify the date and the number of payments. Instead, it allows the same payment details to be processed on a monthly basis.
- Select Merchant Key (Drop-down): To integrate the pay function with your payment processing account, select the merchant key from the dropdown. Ensure you've created a merchant key under "Merchant > Merchant Keys" for it to appear in the dropdown.
- Select Campaign (Drop-down): To allocate the caller's payment to a specific campaign, make your selection here.
- To create a campaign, visit the "Campaigns" section in the "Merchant" menu.
- Email Notification (Checkbox): If you'd like to receive an email notification containing the caller's payment information, please check this option and provide the email address to which you want the notification sent.
- Email CC info (Checkbox): Select this option if you'd like to receive an email containing the caller's credit card information, including the last four digits of the card, expiration date, security code, and zip code.
- Select Goto Branch (Drop-down): If you want to direct callers to another branch after completing this branch path, select the appropriate branch from the drop-down menu.
Additional fields exclusive to the "Recurring" option:
- Charge Now (Toggle): Use this toggle to enable an immediate charge in addition to the scheduled recurring payment.
- Recurring Interval (Checkbox): Choose how often the payments will recur: weekly, monthly, or annually.
Voicemail
- Select the mailbox from the drop-down list to route callers.
- Set up voicemail boxes in the 'Voicemails' section under the Phone System menu.
Label
Use this function to categorize your contacts with specific labels and direct them through corresponding routes. Before setting the correct route on the IVR page, ensure that you have created the relevant label on the Contacts page and associated the appropriate contacts with the labels you've created, as outlined below:
- Choose the right label from the Label drop-down menu.
- Configure the branch route for contacts associated with the selected label.
- You can add multiple labels and set different branch routes for each label by clicking the +Add button in the upper right corner.
- To delete a label along with its branch settings, click on the trashcan icon located on the right side.
- If a phone number is associated with multiple labels, the system will use the settings of the label that appears at the top of the list to route the caller.
- The 'Void Expiration' checkbox allows you to override the contact's expiration date. If this checkbox is selected, label routing will still occur even if the contact has expired.
In upcoming sections of this guide, we will provide detailed explanations of additional label-related functions, including Add Label and Remove Label.
Add Label
This function adds a label to the caller passing through this IVR function, making it possible to route the caller based on that label, as follows:
- If the contact isn't saved in the database, this function will automatically create a contact record in the Contacts database and associate the specified label.
- If the contact already has this label associated, it won't make any changes.
- If the contact has a different label associated with their contact info, it will add the new label alongside the existing one.
There are two types of 'add label' functions:
- Direct: Adds a single label.
- Multiple: Provides a menu of label options to choose from, essentially grouping multiple direct functions under a label menu.
Let's take a closer look at each function:
Direct
f a caller's number is not saved in the Contacts database, here’s what happens when you select each of the following radio buttons under 'Add to Another':
- "No": The system will not add the caller's information to an existing record. Instead, it will create a brand new contact record.
- "Yes": The system will search for an existing caller record based on the provided phone number and add the caller's phone number to the associated record.
- Any label already associated with the existing contact will also apply to the newly added phone number.
- "Yes & Merge": With this option, the caller's phone number is already in the system and the new label will be added to the associated contact record, plus, the system will allow the caller to merge the contact record with an additional existing caller record.
- "Add to current": Adds the label to the caller's calling ID and enables them to include an additional phone number associated with the same label.
- This process is effective under the following route:
- Add Label branch with 'Add to another' set to "No" and 'Go to Branch' directed to the second Add Label function.
- Second Add Label branch with 'Add to another' set to "Add to current." The second Add Label IVR function, set to "Add to current," combines the new phone number with the prior Add Label branch, linking the label with the same contact. This instructs the system to use the same label as the previous Add Label branch in the route.
- "Allow Change Phone Number" Checkbox:
- When checked, callers can choose the phone number they want the system to recognize them with.
- If this option is selected, please add a greeting or recording instructing callers to enter their phone number (e.g., "Please enter your phone number"). You can use the "Assign File" and "Merge File" buttons to select the appropriate recording for prompting callers to add their phone number.
- When unchecked, the system will use the caller's current ID, the one they used to make the call.
- When checked, callers can choose the phone number they want the system to recognize them with.
- "Phone Type" Radio Button: Callers will be prompted to enter the specified phone type as set here, ensuring accurate categorization.
- For example, if the end goal is to send SMS messages, the system will guide the caller to specify a "Mobile" phone number for that purpose.
- To establish different routes based on phone type, create separate Add Label branches for each type, allowing you to route the caller accordingly.
- "Expiration" Field: Enter the number of days until the contact, to which the label is added, expires.
- "Success File" Button: Click to choose an album and a specific recording to play to the caller upon successful completion of this step. If no recording is selected, the system will proceed to the next step in the route.
- "Goto Branch" Drop-down: Choose the next branch that the caller will be directed to after this one.
Multiple
- In the top left drop-down menu, select "Multiple."
- Use the "+Add" button on the top right to create 'Add label' menu options.
- For each option, specify the input that a caller should enter to access this 'add label' option. Then, select the corresponding label from the "Select Label" drop-down menu for that input.
- If needed, check the "Allow Change Phone" checkbox – refer to "Add Label - Direct" for more details on how it works.
- To delete an 'Add label' menu option, click the trashcan icon on the right.
Remove Label
This function is used to remove a label from a contact when they pass through this point in the IVR flow. It serves multiple purposes, including enabling callers to opt out of a service or removing them from a specific plan if their payment method is found to be invalid.
To set up the "Remove Label" function, simply choose the label you want to remove from the contact using the "Select Labels" drop-down menu.
Conference
With this function, you can direct callers to a conference or "classroom" you've previously created in the Conference menu.
- "Moderator" Checkbox: Every conference needs a moderator. If you check this box, this branch becomes the entry point for the moderator to join the conference. If unchecked, it's for participants to enter the chosen conference. Usually, the Moderator conference branch comes after a password branch and isn't open to all callers.
Connect
This function allows callers to connect to a home or cellphone number. There are three options:
- Direct: Callers are connected directly to the specified phone number.
- Multiple: Behaves like a menu function, allowing callers to choose an external/outbound phone number based on their input.
- Pattern: Initially connects callers to the first phone number, and if there's no answer after a specified duration (number of seconds), it will move on to the next phone number in the list.
Let's explore the Direct function, keeping in mind that Multiple and Pattern functions operate similarly to Direct, with the ability to add multiple connect options (menu).
Please note that with these two options, you can only set one voicemail option regardless of the call's destination.
Direct
- "Set Voicemail Box" button: If the call doesn't connect, the caller can leave a message in the business/organization's designated voicemail box.
- Make sure you have created the appropriate voicemail in the Voicemail page to select from the drop-down options. Otherwise, the call will be directed to the "No Route Found" path.
- You can also set a default voicemail box that will be used if none is specified.
- "Interrupt" Checkbox: If checked, the caller will have the option to return to the previous step in the route instead of being connected to the external phone number.
- "Extension/Connect" Drop-down: You can select to connect the caller to an extension or an external phone number.
- If you choose to connect to an extension, Select the desired extension option from the Select Extension drop-down.
- To enable the "Extension" option, make sure you have configured extensions for your hotline. Reach out to support@voitex.com to set up your extensions.
- An extension can either be a physical extension linked to a designated office phone number or an external phone number used as an extension. The latter option is essentially similar to the "Connect" feature but with a distinct billing structure, involving a monthly fee and unlimited call duration. This option is suitable when calls are consistently directed to the same phone number, unlike "Connect," which allows for dynamic phone number changes.
- To avoid additional charges for an extension when you have an office extension phone number, consider using your extension's forwarding number. Set this up in your Extensions module. The cost for this service is $30 per month, offering unlimited minutes.
- An extension can either be a physical extension linked to a designated office phone number or an external phone number used as an extension. The latter option is essentially similar to the "Connect" feature but with a distinct billing structure, involving a monthly fee and unlimited call duration. This option is suitable when calls are consistently directed to the same phone number, unlike "Connect," which allows for dynamic phone number changes.
- If you select "Connect" to an external phone number, enter the desired number.
- Keep in mind that it incurs a cost of $0.04 per minute for US calls and varying prices for international calls.
- "Sec Duration" Field: Sets the duration for which a caller will wait on the connect route before being routed back to the previous step. The default duration is 30 seconds, and you can enter any valid value between 0 and an unlimited number of seconds.
- If you prefer callers to leave a voicemail in the hotline's voicemail instead of the connected number, ensure that the "Sec Duration" is shorter than the time it takes for the caller to reach the voicemail of the connecting number.
- "Notes" Field: Enter notes related to this branch here.
- "Confirm" Checkbox: When this option is enabled, the owner of the connected phone number will hear a message announcing an incoming call from a specified phone number. They can then choose to accept the call or send it to voicemail.
- "Music On Hold" Checkbox: Music on Hold: This feature plays music to the caller while waiting for the call to connect. If disabled, the caller will hear the regular ringing sound. The default music on hold will be played.
- "DID as CID" Checkbox: If this checkbox is selected, the incoming call will show the hotline number as the caller ID and not the original caller's ID.
Connect vs. Transfer to Number: The "Transfer to Number" option is designed for transferring calls to another hotline within the Voitex organization, unlike the Connect function.
Custom Input
This function gathers caller information, including date, time, phone number, and input as they pass through this branch. You can receive this data via email whenever a caller goes through this branch.
"Goto/Validate" drop-down: Select how the system responds after receiving input. You can direct the caller to a single destination or, based on their input, validate and route them accordingly.
"Goto" option: In this mode, regardless of the input, the caller will always be routed to the same branch. Here are the options:
- "Allowed Inputs" field: Enter a value from 0 (default) to unlimited. You can also specify input requirements. For example, if you want the caller to input a 10-digit number, enter [10], or for an exact digit like '10', simply input '10'. Click the "i" icon next to the Custom Input button to see more specification options.
| Input Format | Example | Description |
|---|---|---|
| Selection Range | '10-250' | Can input any amount starting from 10 up to 250. |
| Specified Only | '2,5,23,108' | Can input one of the specified numbers only. |
| Digit Count | '[20]' | Can input any number but must be exactly 20 digits. |
| Exact Digit | '33' | Can input only the exact number 33. |
Note: You can input multiple formats by separating them with the '|' symbol. For example, if you want to allow both 'any 4 digits' and '38,42', you would enter it as '[4]|38,42'.
- "Input Not Required" checkbox: Check this option if callers shouldn't provide any input. Admins may use this to track the number of callers passing through, etc.
- "Pound Required" Checkbox: Select this if callers need to enter a pound (#) after their input.
- "Alert Email (All/On Input/Never)" radio button: Choose your email notification preferences for this branch:
- All: Select this if you want notifications every time a caller passes through, regardless of input.
- On Input: Sends email notifications with caller input to the specified email address.
- Never: Admin won't receive notifications when callers pass through. Enable email notifications by selecting other options.
- "Select Goto Branch" drop-down: Choose the destination branch where the caller will be directed after the current branch.
- "Review" Checkbox: When selected, the system will play back the input to the caller, giving them the opportunity to confirm its correctness. If it's incorrect, they will have the option to re-enter the input.
- "Review Type" (TTS/Custom) radio button: Choose your Review type, either TTS (Text-to-Speech) or Custom, as follows:
- "TTS" drop-down: Select from the following TTS options:
- "TTS":
- "Full Number": The system will read back numbers in English as words (e.g., '250' becomes 'two hundred and fifty').
- "Dollar Amount": It will read numbers as dollars (e.g., '250' becomes 'two hundred and fifty dollars').
- "Single Number": Numbers are read individually (e.g., '250' becomes 'two, five, zero').
- "Variable": This option is for developer use. Contact support@voitex.com for more details.
- "Yiddish": Select this option to have numbers read back in Yiddish based on the configured setting.
- "Custom": Select this option to create custom recording. For instance, you can assign '1' to mean "Starter Plan" and '2' to mean "Advance Plan." by linking the corresponding recording sort numbers from the library to the respective inputs.
- "TTS":
- "Custom" option: Select this option to play custom recordings both before and after the input is entered.
- "TTS" drop-down: Select from the following TTS options:
"Validate" Option: Functions as a menu where, depending on the input being validated, the caller will be directed to the appropriate destination or the next phase within the branch route. To add an input, click the "+Add" button located on the top right corner to input values and define where the caller goes based on their input.
- To improve the customer experience based on their preferred language, think about adding various custom input options based on Language Route function settings. Contact support@voitex.com for additional information.
To access Custom Input Logs, navigate to Settings, choose the 'Custom Input Logs' option on the right, select the desired log date. You can view the logs directly, or to export them in CSV format, click the export icon on the right.
Bookmark
The bookmark feature enables callers to save their position within the recording they are currently listening to.
Note that most of this feature is set in the backend. Reach out to support@voitex.com to learn more.
- Callers can bookmark their position in the recording they are listening to by entering "8" followed by "1."
- To allow users to access their bookmarks, add an input on the main menu leading to the "Bookmark" function branch. In this branch, callers can select their desired bookmark number (0-9, with a total of 10 available bookmarks). Users can choose between system recordings or custom ones.
- If a caller hangs up without saving a bookmark, they can recover their 'lost bookmark' by choosing the "Bookmark" menu option and entering the "#" symbol to resume from where they left off.
- This choice of using "#" for lost bookmarks is appropriate, considering that IVR routing typically employs 0-9 menu options.
- "Enable Point Direct" radio button: Select "Yes" to allow callers to listen to a specified album by entering their Album ID. To restrict access to certain albums, simply select the album(s) to exclude from the drop-down menu. Select "No" if you prefer not to enable this feature. Disable Hangup.
- Bookmark" Radio Button: Choose "Yes" to limit the ability of callers to return to their hangup bookmarks. Typically, this option is selected to prevent unintended access to outdated content or by random callers like children who might redial and accidentally reach sensitive content.
Playlist
Similar to Bookmark function, callers have the option to save their favorite recordings to a custom playlist, which they can access from any Voitex account.
- By default, while listening to a specific recording, callers can add it to their playlist by pressing '8,' then '2' to like a file, and '3' to save it to a playlist.
- 'Like a file' allows callers to save a single recording to their 'liked' playlist, while 'Save to a playlist' enables them to categorize several recordings under specific playlist folders (e.g., Yom Tov sessions, parenting classes, etc.).
- This feature is enabled by default for all Voitex accounts.
- Callers can access their saved playlists through one of the following methods:
- By entering the specified input in your landing box which will route them to the playlist branch. .
- By dialing 845.606.6006, a dedicated direct number. The system will intelligently recognize their caller ID and grant them seamless access to their saved playlists.
- Additional playlist management features, such as settings, access to the 'liked recording' playlist, and others, are available through the phone.
Note: To prevent callers from adding specific album recordings to their playlist, please ensure that you select the "Disable playlist" checkbox option within the respective album settings.
Dial
This feature enables admins to make calls to US, Canada, UK, or Israel numbers while appearing as if they are calling from the hotline, even when using their mobile phones. To set up this feature in your account, follow these steps:
- "Select caller ID" drop-down: Choose from your available hotlines the caller ID you want to use.
- "Interrupt" checkbox: Check this option if you want the ability to return to the system after making a call through the Dial feature. Once selected, you can return to the system by pressing "*."
- To ensure that only admins have access to this feature, it should be placed after a user validation branch, such as a password or label verification.
- You can connect to any US, Canada, UK, or Israel number using this feature.
Note: $0.04/minute charge for US and Canada. UK and Israel rates vary by area code; reach out to support@voitex.com for prices.
Transfer To Number
Use this feature to transfer calls from one Voitex hotline to another. There are no additional costs for transferring calls between hotlines. Follow these steps to set up hotline transfers:
- Create a 'Transfer to Number' branch.
- Contact support@voitex.com to request the addition of the hotline(s) to the branch you've established. created.
- Choose the hotline to which you want to transfer calls.
- "DID as CID" checkbox: If selected, your call logs will display calls as originating from the hotline to which you've transferred the calls.
Auto Rotate
Use this feature to automatically rotate to the next recording or album on a scheduled basis, be it daily, weekly, or any other recurring interval. This is particularly useful for accounts whose listeners are subscribed to recurring content, such as daily shiur, daily tips, weekly classes, and more.

- Album/Collection drop-down: Choose whether to enable auto-rotation for an album or collection. For Album Auto-Rotation:
- "Album" drop-down: Pick the album containing the recordings you want to auto-rotate.
- "Select Current" drop-down: Select the recording currently playing, so the auto-rotation will begin from the recording following it.
- "Skip Increment" field: Specify the number of skips/incremental rotations the system will perform each time. The default value is "1," but you can change it to, for example, "3" to skip three recordings before playing the next one in the rotation.
- "Continue" checkbox: Check this box if you want the caller to continue listening to additional recordings after the current one.
- "Rotation Cycle" drop-down: Choose the recurring cadence for rotation: Daily/Every Other Day/Weekly/Monthly.
- "Skip Days" drop-down: Set your preferences for skipping certain days or keeping rotation constant ("Never"). You can also select specific timeslots to skip using the timeslot dropdown.
- "Last Rotation" date picker: Select the date and time when the system last rotated a recording. This helps determine when the next rotation setting should take effect.
- "Rotate Albums" checkbox: When the album or recording collection reaches its end, enable this option and choose a new album from the dropdown for the system to continue playing.
- "Status" checkbox: Uncheck this box if you want to disable auto-rotation.
If you select "Collection" in the first drop-down, the rotation will occur at the album level, including several albums within the collection. You have two options:
- "Choose Specific/Play All" drop-down:
- Choose "Specific," and the caller will have the ability to select a particular recording within the album that is currently being rotated.
- Select "Play All," and the system will play all recordings within the album based on the album settings, using either the highest or lowest sort order.
- "Select Collection" drop-down:
- Choose a collection of albums from the pre-populated drop-down list that you wish to rotate. Please note that you must have previously configured your album collection within the Library module.
The remaining settings are identical to those for the "Album" selection.
Day Of Week
Use to configure the system to direct callers to different branches based on the specific day of the week. For example, you can route callers to listen to out-of-office recordings on Friday afternoons.
Simply choose the branch you want to route callers to from the drop-down menu for each day of the week.
Switch Timer
This feature allows you to dynamically direct callers to specific branch routes based on either the date or the time (hour). For example, to guide callers through course start dates, providing relevant information until the courses begin and then switching them to the appropriate route.
- Choose the type of time frame you want to set:
- Hour: Select the start and end times.
- Date: Choose both start and end dates, along with the corresponding times.
- Add a pre-recorded message that provides context for the route change, such as "You've reached after-hours support." Simply click the "Add Recording" button to upload your custom recording.
- Select the appropriate branch from the drop-down menu to route callers to during the specified timeframe.
- If you need to create multiple timeframes, click the "+Add" button and configure the settings accordingly.
Note: You can utilize this feature to make callers listen to a greeting, like sponsored content or vital notifications, before advancing to the next step in your call route. To do so, add a greeting without any extra configuration in this branch.
Password
This feature is typically used to restrict access for callers, offering admins the ability to input a secure password that, when entered, will route callers to a designated limited-access branch.
- "Input" field: Specify the password that callers must enter to access the designated branch.
- "Goto Branch" drop-down: Choose the branch to which the caller will be directed after entering the password.
- "Expiration" date picker: Set the date when the password will expire, denying access to the 'Goto Branch' after that. Leave this field blank for passwords that should never expire.
- "Trashcan" icon: Click to delete a password and its associated settings.
- "+Add" Button: Click to add more passwords and their respective "Goto Branch" routes as needed.
Admin Functions
Broadcast | Modify Auth | Reports | Listen VM | Modify Audio
Broadcast
Admins can use this function to designate the album from which the broadcasted recording will be sourced and to specify the group(s) of contacts to whom the broadcast will be sent (labels).
While there are additional broadcast settings available over the phone, it is useful to configure in your account the default album and labels for when you broadcast similar content to the same group every time. Otherwise, broadcast entirely via the phone when sending different recordings to various contacts.
Note: Any broadcast settings established within the Broadcast module will also be applicable to this function.
Modify Auth
Use this function for password authentication or to assign contacts to labels. Once configured and accessed over the phone, the system offers administrators a range of additional options.
Available Modify Auth Branch Phone Prompts
| 1 | Press 1 for contact labels. |
| 2 | Press 2 for passwords. |
|
|
Cotact labels |
| 1 | To add a phone number, dial 1 and enter the phone number. |
| 2 | To remove a phone number, dial 2 and enter the phone number. |
|
|
Passwords |
| 1 | To add a password, dial 1 and enter the password. |
| 2 | To remove a password, dial 2 and enter the password. |
|
|
When adding a password |
|
|
Enter the goto branch number. |
| 1 | If you would like to set an expiration, dial 1. |
| 2 | Otherwise, dial 2 to save. |
|
|
When choosing expiration |
|
|
Enter the month and day. |
|
|
Enter the year. |
Reports
Access a phone-based summary of your portal's data for the selected date. Enter the date to retrieve key information about your account.
Reports Branch Phone Prompts
| 1 | For today, dial 1. |
| 2 | For the past 30 days, dial 2. |
|
|
After you make your selection |
| 1 | To list all, dial 1. |
| 2 | To list by phone number* 2 and then enter a DID from your account. |
*A specific hotline number from your account.
The system will then list the information available in your portal dashboard.
Listen VM
- "Select Voicemail Box" Drop-down: Select the appropriate voicemail. Make sure you've set up your voicemail boxes correctly in the Voicemail section.
- "All Voicemail Boxes" Checkbox: If you check this option, administrators can listen to voicemails from all voicemail boxes.
- "Disable Envelope Info" Checkbox: By default, the system provides information about each voicemail recording. If administrators want to skip this information and listen to voicemails consecutively, they can check this box.
Modify Audio
This backend feature is designed for admins and allows them to manage audio recordings via phone. Functions include rewinding, forwarding, changing sort numbers, deleting files, transferring files between libraries, and verifying recordings before publication.
- Select a specific album from the drop-down menu, eliminating the need to remember album numbers.
For more streamlined access, administrators can create a menu to route them to the correct album without album number memorization, as follows: [Menu Branch] ➜ [Input 1: Modify Album A, Input 2: Modify Album B...] ➜ [Selected Modify Album Branch]
- "Modify Audio" Checkbox: Check this box to enable audio modification.
- "Greeting Edit" Checkbox: If selected, administrators can change the greeting message. They need to know the album number they want to modify. Usually, this feature comes after a password/admin menu to ensure only administrators can use it.
Advanced Custom Functions
The functions below are less commonly used and are typically part of a more complex system setup. For further information, please contact support@voitex.com.
- Google Sheets Integration: Our system seamlessly integrates with Google Sheets, enabling the capture and storage of phone inputs within a Google Sheets database. With this feature users can store comprehensive survey and test results for each user and more.
- Mask: This function lets the system identify a caller using a PIN (password) entered in this branch, rather than their caller ID. Contacts can call from any phone number by entering their contact's PIN as well as capture additional contact data after passing through this function and entering a PIN associated with their contact record.
- Contact Data Capture: This function allows you to gather additional contact information and store it in the appropriate contact record fields, among other features.
- Speech-to-Text (STT): This function captures speech from callers passing through this branch, converts it into text, and stores it in the appropriate contact record fields. Additionally, the recorded input in this branch can be saved as a recording in a specific album and as a playable recording file in the contact record page.
SMS Branch
The 'SMS Branch' module is like IVR phone branch routes, but for creating SMS text flows.
There are several SMS branch functions, as follows:
Command | Add Label | API | Broadcast SMS | Contact Data | Label | Mask | Notify | Pay SMS | Remove Label | Switch Timer | Survey
Before we detail each function, the below applies to all SMS functions:
In the 'If Not Route Found' drop-down menu, you can define what should occur when an incoming text message doesn't match any of the current SMS branch commands. The available options include:
- Respond: The system will send a predefined response to the sender.
- Goto: The system will direct the message to another specified location or branch.
- Respond & Goto: A combination of both responding with a predefined message and directing the message to another branch.
- Respond & Land: Works similarly to "Respond & Goto" with the system responding to the contact's SMS. However, it only advances to the next step in the route once the contact replies to the response in this branch.
Note: To activate SMS branches, ensure your hotline number is SMS-enabled by clicking the chat icon located on the right of your hotline number in the dashboard. Also, select the SMS landing branch from the 'Settings' dropdown after creating an SMS branch; unlike IVR, SMS doesn't have a default landing branch
To create a new SMS branch, click the purple '+' button on the left, provide a title for the branch, select the desired function, and then click 'Save'. Review the following function options to select the appropriate one. Similar to IVR Phone Branches, you can edit, sort, search for, delete, and bulk delete SMS branches by clicking the edit pencil button and more.
Command
Similar to the phone menu function, the Command function allows you to capture contact input and react accordingly by sending replies and directing them to the next stage in the route. For example, if a contact texts "Subscribe," the Command function will auto-reply with a subscription confirmation and move the contact to the next related SMS branch.
- "Command" field: Enter optional keywords or phrases that customers may send to your number, such as 'Join' or 'Stop.' The following fields will allow you to specify what should happen when such a message is received by this hotline number.
- "Goto" drop-down:
- "Respond": This field allows you to define the system's reply for specific SMS inputs. For example, if someone texts "Yes," you can input the system's reply like, "We're thrilled to have you onboard; enjoy your plan's exclusive content." Plain text input is preferred.
- "Goto" (Default): After receiving a command via SMS, you can specify where the contact will be routed or what the system's reply and next steps will be. To do this, select the appropriate next SMS branch from the "Select Goto Branch" dropdown.
- "Respond & Goto" combines the first two types. When the system receives the customer's message, it responds and directs the customer to the next SMS branch. For example, if the next branch is 'notify,' you will receive an email with the contact's message as soon as it's received after the customer gets a response to their message.
- "Respond & Land" works similarly to "Respond & Goto" with the system responding to the contact's SMS. However, it only advances to the next step in the route once the contact replies to the response in this branch. For instance, if the next branch is 'notify,' the caller will receive a response to their text immediately. The system will email their response to you only when the contact replies to the response (a second interaction).
- Under this function, you can add multiple command options by clicking the '+Add' button at the top right.
- To delete an option, click the trashcan icon on the right of the command field.
Add Label
When a contact reaches this SMS branch, you can assign a label to their contact card by selecting the appropriate label from the dropdown menu. This label will be added based on your selection.
API
This is a developer branch function. Click here to learn about API docuemntation. Reach out to support@voitex.com to learn more.
Boradcast SMS
Note that this SMS function incurs an additional cost of $0.03 per 160 English characters and 70 Yiddish characters (including spaces).
This is an admin-only feature to send broadcasts via call or SMS by texting the system to access this branch. Select "SMS" or "Call" in the drop-down to choose how you'd like to send your broadcast.
- SMS/Call drop-down: Select to broadcast via SMS or Call when initiating a broadcast via SMS.
For SMS:
- "Prefix" field: Enter the custom prefix you want customers to receive with text message broadcasts. For example, you can input "For assistance at any time, reply with 'Help'." This prefix will accompany any SMS broadcasts initiated through this branch.
- "Select Labels" drop-down: Choose the contact group for your SMS broadcast by selecting the relevant label(s) associated with the group. If not selected, the system will prompt you to choose the appropriate label via phone.
- "If success" section: Select what should happen if you went through this branch successfully.
- Select the success next step type in the drop-down. You could either select Respond, Goto, Respond & Goto, and Repond & Land.
- If you select "Respond" for instance, enter in the "Response" field the success respond the admin will receive in the Response field.
- Select the success next step type in the drop-down. You could either select Respond, Goto, Respond & Goto, and Repond & Land.
For Call: When selected, this option initiates a call broadcast. It operates similarly to SMS but requires you to choose an album and specify the recording sequence number that callers will hear during the call.
Contact Data
This is an advance feature, reach out to support@voitex.com to learn more.
Label
This feature is used to filter callers, ensuring that they belong to an approved contact group before routing them to the next branch.
- By selecting the appropriate label(s), when a contact passes through this branch, they will only proceed if they have the specified label on their record.
- Use the action drop-down to select the next step, which can be Respond, Goto, or Respond & Goto.
Mask
This is an advance feature, reach out to support@voitex.com to learn more.
Notify
When a contact passes through this SMS branch, it will send notifications containing their information to a specified email address.
- Enter the email address where you'd like to receive these notifications and set a prefix for emails originating from this branch for your reference.
- Use this function to collect information via email and take appropriate actions. For example, all subscriber information can be emailed to users so they can proceed with subscriptions.
- SMS Via Email: This feature enables users to perform SMS activities through their email accounts. Messages sent to the designated email address can be replied to via email, and these responses will appear as SMS messages to the customer. To check if this feature is available in your plan, please contact support@voitex.com for more information.
Pay (SMS)
Similar to the pay branch in the phone IVR, this branch allows customers to make payments just via SMS.
- "Amount" field: If entered, this will be the fixed amount charged to all customers. If not entered, the amount will be based on customers' input.
- "Ask Name" checkbox: Check this option if you want to capture the payee's name along with the payment.
- "Ask Email Address" checkbox: Check this option if you want to capture the payee's email address along with the payment.
- "Email" field: Enter the email address where payment notifications should be sent.
- "Select Campaign" drop-down: Choose the campaign to associate the payment with. Ensure that you have set up campaigns in the Merchant menu option.
- "Select Merchant Key" drop-down: Select the merchant key through which the payment will be processed.
- "If success" section: Select what should happen if the payment was processed successfully.
- Select the success next step type in the drop-down. You could either select Respond, Goto, Respond & Goto, and Repond & Land.
- If you select "Respond" for instance, enter in the "Response" field the success message.
Remove Label
This is the opposite of Add label, if a contact goes through this branch it will remove it from the selected label.
Switch Timer
Similar to the IVR branch switch timer, if the SMS branch route occurs during the specified date and time set in the timer, it will direct the contact to the designated next branch (choose the desired branch from the prepopulated SMS branches).
- You can create multiple switch timer options, each triggering a different branch based on the specified date and time, by clicking the "+Add" button.
Survey
Use this feature to gather customer information, which will then be saved in an Excel sheet.

- "Email" field: Enter the email address where you want to receive notifications when surveys are completed.
- "Reset Command" field: "Reset Command" field: Specify the command for restarting the survey. For example, if set to "Restart," texting "Restart" will begin the survey from the first question.
- "Email Reset" checkbox: Select to get notified via email every time a survey is restarted.
- "Cancel" field: Specify the command for canceling the survey.
- "Email Cancel" checkbox: Select this box to receive email notifications when a survey is canceled.
- "All/Finish/Reset/Cancel" drop-down: Choose which survey results to export, including all, finished, reset, or canceled surveys.
- Specify the date range for the results you want to export.
- After making your selections, click the export icon to download the survey data.
- "+Add" Button: Click to add more survey questions with associated fields. For each question, fill out the following fields:
- Title (required): Enter the question title for your reference.
- Text/Number: Select the expected reply input type, either text or numbers.
- Command: Enter the question your contact will see.
- Respond: Specify the response you expect from your customers. Keep in mind that the system will only accept responses that match your input here.
- Trashcan icon: click to delete survey question with its associated fields.
Contacts
On this page, you can manage your contacts and create labels. Think of labels as tags or folders for your contacts, which help the system route calls based on the assigned labels.
Manage Labels
Follow these steps to create and manage labels:
- Click the left purple button.
- Enter the label name and number, then click "Save."
Similar to IVR branches, you can also search for specific labels, sort them, edit by clicking the pencil icon, select one or two for deletion, and set an expiration date per label.
Create Contacts
After creating labels, you can proceed and create contacts:
- Click the right purple button labeled "+Add Contacts" to open a sliding panel where you can input contact details, including Name, Phone Number, Email, and more.
- The only mandatory field is a 10-digit phone number without special characters.
- Within the "Phones" section, you can add multiple phone numbers and specify their type (defaulted to Home or Mobile) by clicking the "Add" button on the top right.
- Be sure to select a label from the "Select Labels" drop-down menu, aiding in categorizing contacts for easy sorting and retrieval.
- Utilize the "Notes" section for free-form notes to reference in the future.
- For advanced information, such as passwords or PIN numbers, use Custom fields (A-J) to store data that the system can access.
- Set an expiration date for the contact from the provided drop-down menu. When a contact expires, their information remains stored, but they won't have access to protected content.
- 🆕 Call Center: This is an advance feature, reach out to support@voitex.com to learn more.
View and Manage Contacts
Once a contact is created, you'll see a summary of their high-level information in the table view, including their First and Last name, phone number, and Email.
- To access the complete contact information card, simply click on the corresponding entry in the table.
- To search for a specific contact, click the magnifying glass icon at the top and enter your search query.
- To sort the contact order, click on the table column header.
Importing and Exporting Contacts
You can easily import and export contacts using the top-right action drop-down button:
Import
- Select the label(s) for the imported contacts.
- Upload a plain text Excel sheet using the "Upload File" button. Ensure it's free from formatting like styling and borders.
- Note that phone numbers must be in column C; other columns are not critical.
- Click "Import" to complete the process.
Import Custom
Here, you can specify what each column represents. For example, if the first column is for "First Name," make sure it's labeled as such at the top, and do the same for other columns.
- To enable the import, you need to:
- Select label(s) from the label drop-down list.
- Arrange the columns by dragging the column chips from left to right to match your sheet's order.
- select update checkbox - if you already have the contacts phone number stored in your database, it'll update them with the newly imported information
- once update checkbox is selected, you have the option to select update blank - means that if there's an existing contact with the same imported phone number, when this option is checked, it'll delete all previously saved contact info that the new import does not contain (please be extra careful to ensure the right information isn't deleted mistakenly)
- save as default - if checked, it'll save the column order selection for future imports — then on-custom ones will essentially become the custom import template you've created here
- upload file button - select the locally saved excel sheet of your contacts you've prepared
- click the import button once you're done
- Export - will export in CVS format the existing contacts
- Export Custom - select the way you wish the contact info to be exported. If you wish the first column to include the First Name, make sure the first name chip is dragged to the right first, and so on. And then click the export button.
Edit Contacts
- To edit a single contact, you could do so by clicking into it and updating the information in the sliding panel.
- To edit a few contacts at the time, select the appropriate contacts by checking off their checkboxes on the left, and hit the Actions drop-down button on the top right, and select one of the following actions:
- Add Label - will allow to add a label to one or several contacts at the time.
- Remove Label - will remove a label from one or several contacts at the time.
- Delete - will delete one or more contacts at the time
Notify Contacts
The Notify feature allows you to specify contacts to be notified via text or call. The call notification can direct the contacts to a specific IVR branch for a more detailed path.
- Use Case 1: Companies can send a call or text to clients and route them to a label branch after call notification, confirming who received the notification. This helps track message delivery efficiently.
- Use Case 2: For taxi services, Notify can inform clients about their ride details (driver's name, plate number, etc.) through a call or text by routing them to an API branch that retrieves and plays all relevant information to the client.

SMS Notification
Broadcasts
The Broadcast feature allows you to send automated messages or notifications to a large group of contacts simultaneously via phone calls and SMS. Use it for important announcements, reminders, marketing, and more. You can configure settings and initiate broadcasts directly from the Broadcast page.
Note that this feature comes with an added cost, as follow:
- Domestic (US + Canada) Rate: $0.05 per minute
- SMS Rate: $0.03 (per 160 English characters or 70 Yiddish characters)
- While SMS broadcasting is an effective communication method, but it can be a lengthy process. To ensure you follow all registration steps correctly, please contact support@voitex.com for assistance.
Note: To start a broadcast, you must have a minimum credit balance of $50 available. To add credit, click the "+Add" button located to the right of your Credit balance.
The top banner on the Broadcast page provides access to your broadcast account's information, reports, and settings. Specifically:

- View your account details, including its activation status, the number of available broadcast ports, broadcast rates for calls and SMS, as well as your available credit funds.
- Click the "+Add" button to add credit funds to ensure your account is ready for broadcasting.
- To schedule a new broadcast, simply click the "New Broadcast" button on the left and provide the following details:
- "New/From Previous" drop-down: Select either "New" to create a fresh broadcast from scratch or "From Previous" to use settings from a previous broadcast as a template for your upcoming message. The "From Previous" option enables you to replicate and adjust previous broadcasts for your new messages.
- "Call/SMS" drop-down: Choose whether you want to broadcast via call or SMS.
- For a call broadcast, configure the following settings under "Broadcast Details":
- "Broadcast Title" field: Enter a title for the broadcast for future reference.
- "Label" drop-down: Select the contact labels you want to broadcast to.
- "To Start" drop-down: Choose "Now" to send the broadcast immediately upon creation, or select "Later" to schedule it for a future date using the date picker.
- "Recording Type" Drop-down:
- Choose "Select" to pick a specific recording from your existing albums for your broadcast by selecting the right album and recording from the respective drop-downs.
- 🆓Choose "Upload" to add a new recording right here, saving you the trouble of managing it on your Library page. Pick the album where you want to place the recording and follow the upload options, including "Upload File" and "Text to Speech (TTS)," which work just like the recording upload choices in the Library page.
- Before saving your broadcast by clicking the 'Save Broadcast' button, please review the agreement details carefully and check the acknowledgment checkbox to finalize the process
- "Broadcast Settings" tab: After you've filled in the broadcast details, navigate to this tab and complete the following:
- "Caller ID" field: Enter the number (any number) from which the call will be displayed to the recipient.
- "AMD" (Answering Machine Detection) drop-down: Choose whether the system should detect if a human or voicemail answers the call and adjust the timing accordingly before playing the broadcast recording.
- No: The system will play the recording as soon as there's any answer, be it a human or voicemail recording.
- Yes: The system will observe and, if there's no answer after a few seconds, it will wait a bit longer to detect the voicemail box and leave a message with the recording.
- "Phone Type" checkbox options: Select "Home" or "Mobile" if you want to send the broadcast message specifically to either home phone numbers or mobile numbers. If none is selected, it will be sent to all phone numbers associated with the contacts under the labels you selected.
- "Retries" field: Enter the number of times the system should attempt to connect if the call is busy or doesn't go through. The default is 0, which means the system won't retry.
- "Retry Wait Sec" field: Enter the number of seconds you want the system to wait between retry attempts.
- "Connect to Number" drop-down: Choose the input number that will connect the call to one of your IVR branches. For example, if you want to allow call receivers to donate, you can say "Press 1 to donate," and if the caller presses 1, it will direct them to the donate branch.
- "Enter call number" field: Enter the hotline number to which you want the caller to connect once they press the number you've selected in the "Connect to Number" drop-down.
- "PTC Route" drop-down: Choose from your hotline IVR branches the branch to which the contact will be directed when they press the number you've selected in the "Connect to Number" field.
- Note: When your contact is redirected to a branch as part of the broadcast activity, you will continue to incur charges based on the broadcast metered rates.
- "Allow DNC" drop-down: Use this option to allow your contacts to place their number on the Do Not Contact list for your hotline, essentially unsubscribing from future broadcast messages. Select "Yes" if you want to enable this feature. Your contacts will need to press "9" (be sure to include this instruction in your broadcast recording).
- "DNC Labels" drop-down: Choose specific labels to exclude certain contacts from this broadcast, typically those who have opted out of your hotline broadcasts.
- "DNC Save" Drop-down: Choose the label under which unsubscribed contacts should be stored.
- "Ports" field: Specify the number of concurrent broadcasts to be sent simultaneously. This should be configured in the backend and we recommend not editing it. Contact support@voitex.com for more information.
- "Confirmation" field: If you want to receive a confirmation call when your broadcast is successfully published, enter the phone number where you wish to be notified.
- For an SMS broadcast, enter the appropriate details under the "Broadcast Details" tab in the same manner you would configure a call broadcast. The only difference is that for SMS, you'll be entering the SMS message you wish to broadcast. Once done, you'll head over the Broadcast Settings tab which contains some of the settings available for a call broadcast.
- "Transactions" button: Click to access a report detailing your broadcast-related charges, including the date, amount, and number of broadcasts. You can also download the report by clicking the export button in the top right corner and search for specific charges using the search icon on the left.
- "Reports" button: Click here to access the broadcast activity report, which includes ID, Broadcast Name, Follower Groups (labels), Date Added, Status, Cost, and Actions. You can also download a detailed view of your broadcast activity and search for specific broadcasts using the search icon.
- "Broadcast Schedule": To schedule a recurring broadcast, click the timer icon at the top right and select the "Add Schedules" button on the top right. Once clicked, you'll see the same settings as when creating a regular broadcast, with additional options for specifying the repeating schedule, as follows:
- "Status On/Off" drop-down: To deactivate a recurring broadcast, change the default option "On" to "Off."
- "Cycle": Select the recurring schedule based on your preference:
- Daily: Choose this option to schedule a daily broadcast. You can specify specific days to skip the broadcast.
- Weekly: Select this option to schedule a weekly broadcast. Pick the day of the week you want the broadcast to run.
- Monthly: Select this option for a monthly broadcast. Choose the "To Be Sent" date of each month using the date picker.
- "Time Slot" drop-down: Choose the time slots, as defined in your settings, to exclude the broadcast from being sent. These time slots could include Jewish holidays, etc.
- "Time" field: Specify the time when you want the broadcast to be sent.
- In addition to scheduling a broadcast, you can also view the broadcasts scheduled under your account. This includes details such as Title, Caller ID, Cycle, To Be Sent (Date and Time), and actions like Edit or Delete. You can also search for a specific schedule.
- Settings: Click here to adjust your general broadcast preferences. These preferences serve as defaults but can be modified for specific broadcasts.
Note that when broadcasting via phone or SMS, the system will follow to default settings configured here. Settings such as "AMD" through "PTC" are consistent with individual broadcast settings outlined above.
- Here are the details for the specific Broadcast General Settings:
- "Default Album" drop-down: Select the album from which you want to choose recordings for the broadcast.
- "Window" fields: Specify the time range during which you prefer your broadcasts not to be sent (start and end times). These settings apply universally, as customization on an individual broadcast level is not possible. If a broadcast is marked as "In Window," it means it cannot be sent during the specified time range.
- "DNC Core" button at the bottom left: Use this feature to exclude specific phone numbers, such as emergency or Hatzalah numbers, from receiving broadcasts. To enter the phone number, click the "+Add Phone" button, enter the phone number you wish to exclude, and click "Save." You will also be able to view the list of phone numbers included in your DNC Core list.
Conference
The Conference module includes several menu options, which are: Conference Rooms | Live Confrence | Conference Schedules.
Additionally, in this section, we will provide information about the various phone prompts available for Conference Rooms.
Conference Rooms
This page allows you to create and manage conference rooms along with their details in a table, edit or delete existing conference rooms, and more. After creating a conference room, it's crucial to assign it to the appropriate IVR Conference branch. With your account, you could run multiple conference rooms simultaneously.

- "+Add Conference Room" button: Click to create a conference room and enter the appropriate conference room details in the sliding right panel, as follows:
- "Room Number" field (required): Enter a unique room number for future reference.
- "Room Name" field (required): Enter a unique room name for future reference.
- Recording section:
- "Start on Moderator Entry" checkbox: Check this box if you want the conference recording to begin automatically when the moderator enters the conference. Otherwise, you can start recording by dialing "#" + "8" over the phone.
- "Stop on Moderator Leave" checkbox: Check this box if you want the conference recording to end automatically when the moderator leaves the conference. Otherwise, you can manually stop the recording by dialing "#" + "8" over the phone.
- NOTE: To ensure proper saving of your recording, please ensure there is only one moderator at a time.
- "Select Record Album" drop-down: Choose the album in which you want to save the conference recording.
- Mute Settings Section:
- "Mute Default" radio-button: Choose "Yes" if you want participants to be muted automatically upon entry. You can also set this as the default via phone (see Prompts Table below).
- "Unmute" radio-button: Select one of the options below based on your preference:
- Approval: Participants can unmute themselves after you approve it.
- Allow: Participants can unmute themselves without any prior approval.
- Not allow: Participants won't be able to unmute themselves.
- General Settings section:
- "Music On Hold" checkbox: Check this box to play music on hold for participants until the moderator joins.
- "Announce Number" checkbox: Check this box to announce the number of participants in the conference when they join.
- "Max Participants" field: Specify the maximum number of conference participants (excluding the moderator) by entering a number. For example, entering "3" allows up to 3 participants in addition to the moderator, totaling 4 members.
- "Select Sub Conference Rooms" drop-down: Choose your sub-conference room from the prepopulated list of conference rooms.
- Sound Settings section: After creating the album with the associated recordings under the library, select the right recording for each of the following conference stages:
- "Select Sounds Album" drop-down: Choose the album where you've stored the conference room sound recordings.
- "Select Hold Sounds" drop-down: Pick the recording for the on-hold sound.
- "Select Close Sounds" drop-down: Choose the recording for when the conference completes.
- "Select Muted Sound" drop-down: Select the recording for when a participant is muted.
- "Select Unmuted Sound" drop-down: Choose the recording for when a participant is unmuted.
- After making your selections, click the "Submit" button to save your conference room settings.
- Conference Room details table: View the details of your conference rooms, including room number and name. To find a specific room, click the magnifying glass icon at the top and enter the room's identifying information.
- To edit conference room settings and specifications, click the edit pencil button on the right.
- To delete a conference room, click the trashcan button on the right.
Note that all conference room actions can be done during the conference via phone, as outlined in Prompts Table below.
Conference Room Phone Prompts Options
Press "#" during the conference, and then select the following prompt based on the desired outcome (outlined in the right column):
Moderator Prompts
| 1 | Total participants |
| 2 | Unmute raised hands |
| 3 | Mute a participant |
| 4 | Start playing a file |
| 5 | Stop playing a file |
| 6 | Mute/unmute all participants – 1. Mute all 2. Unmute all 3. Mute all and set 4. Unmute all and set |
| 7 | Change room mute options |
| 8 | Record options: 7. Start/resume 9. Stop (then press 1 to save/pause) |
| 9 | Close room |
Participants Prompts
Press * and then:
| 1 | Mute/unmute: raise/lower hand (depends on room settings) |
| 9 | Exit conference |
Live Conference
View your live (active) conference room(s) and manage them directly on this page as follows:

- The default view displays ongoing (live) conference rooms. To view all active (available) conference rooms, click the "Show All" toggle button.
- To view and manage conference rooms, click on the appropriate live conference room section/tile.
- Click the conference rooms view you prefer — grid or tiles (default view).
Control the conference room you choose, as follows:

- In the conference rooms drop-down, select the conference room you want to manage, or switch to a different room.
- Check the number of moderators who have joined the conference. "0" indicates no moderators.
- The participants tile shows the number of participants. Use the green mic icon to unmute all participants or the purple mute icon to mute all.
- Click the 'x' button to remove all participants from the call.
- Review moderator information and click 'x' to remove a moderator from the conference.
- See the list of participants with their names, phone numbers, call duration, and take actions like muting/unmuting or kicking out specific participants using the 'x' button.
- Click the refresh icon to update the page with the latest data.
- Click the pencil icon in the top right to adjust or override conference room settings.
Conference Schedules
Use this feature to schedule conferences and play prerecorded content automatically.
- In the "Grid" view, you can see your scheduled conferences, including the scheduled time, conference room, the recording that will play, and actions like editing or deleting. You can also search for a specific conference.
- To schedule a conference, follow these steps:
- Click the "+Add Conference Schedule" button.
- Select a conference room from the "Select Conference Room" drop-down.
- Choose the album from the "Select Album" drop-down where the recording is stored.
- Pick the specific recording from the "Select Audio" drop-down that participants will listen to.
- Use the "Schedule Time date and time picker" to select the date and time when the scheduled conference should start.
- Click the "Save" button to save your scheduled conference.
Call Center
This is an advance module. Reach out to support@voitex.com to learn more.
Library
This section is where you store your albums and their recordings. Unlike the IVR, which plays parts of the albums and recordings, this is essentially a database to store and manage all of your media content.
- To create an album, click the purple "+" button on the left side and provide the following information in the right-side panel:
- Album Number (required): Enter any unique number.
- Album Name (required): Enter descriptive name for your album.
- Shared Album: If you have multiple hotlines and want to share this album with more than one hotline number, please contact support@voitex.com.
- Play Settings section:
- "Order By" radio button: Select the playback order for recordings within the chosen album. You can choose between "From Highest," which starts with the highest sort number (recording number), or "From Lowest," which begins with the lowest sort number.
- "Presound" checkbox: If you want a brief recording to play between each recording, check this box and choose the desired presound option from the "Select Presound Type" drop-down:
- "English Number" - plays the recording number (sort number) in English: 1 (one), 56 (fifty six), etc.
- "English Number - Split" - plays the recording numbers included in the number (for sort number "56" the system will play back "Five, Six").
- "Yiddish Number" plays the recording number (sort number) in Yiddish: 1, 2, etc.
- "Yiddish Number - Split" - Similar to the "English Number - Split" option above, but in this case, the system will play the numbers in Yiddish.
- "Quick Beep" - plays a quick beep sound between recordings.
- "Soft Beep" - plays a softer beep sound between recordings.
- "Admin Code" field: If you enter a specific code here, as an admin you'll be able to to delete a recording by calling your hotline and entering "5" + "0" + "the code" while listening to the specific recording.
- "Allow CID Delete" checkbox: If you want to allow callers to delete their own recordings, you can enable this option. Callers will be able to delete their recordings by pressing "5" and then "4" during the call. This option is only available when the caller is using the same phone number they used to leave the recordings on the system.
- "Increment By": This feature is rarely used. By entering a number here, the system will skip a certain number of recordings as specified. For example, if you input "2," the system will play recording 4 after listening to recording 2, assuming it's set to play from the lowest number recording.
- Instructions section:
- "Type" radio button: Select how you want callers to hear instructions:
- Audio: Choose this option for consistent instructions using a single recording. Typically, this option is used when the instructions remain the same over time. Select the appropriate album and specific recording from the dropdown menus.
- Album: Choose this option for dynamic instructions that you'll update regularly. Load these instructions into a specific album chosen from the dropdown menu.
- "Type" radio button: Select how you want callers to hear instructions:
- Intro section: In this section, you can decide if a caller will listen to an introduction before the album starts. Begin by selecting the "Type" radio button, and choose from the following options:
- "None": No audio will play before the album.
- "Rec(ording) Only": A recording will play before the album. Choose the correct album and the appropriate recording from the related drop-down menus. For this option, leave the third drop-down empty. Specify the "Intro At" - when the album introduction will play, as follows:
- "Play Album" - The introduction will only play when the album is set in the IVR branch to play the album recordings one after the other.
- "Choose Specific" - The introduction will only play when the album is set in the IVR branch to allow customers to listen to a specific recording within the album.
- "Both" - The introduction will play when either the album is set in the IVR branch to play the recordings one after the other or when allowing the customer to choose a specific one to listen to.
- "Rec & Count" will play a recording and inform the listener of the number of the recording within the album they're currently listening to.
- Intro at —"Intro At" - uses the same configuration as the options mentioned above under "Rec Only."
-
"Count Type" radio button: Choose the recording number (sort number) type the system will play back:
Highest Sort: Will play the number of the highest sort number in your album list, even if lower sort number recording(s) have been removed
Total Count: Will play the total number of recordings in your album.
- Choose the appropriate options from all three drop-down menus. In the final drop-down labeled "Select After Recording," you will specify the count type (e.g., lectures, lessons) or any other recordings that the caller will listen to after hearing the count.
- After section:
- "Escape" checkbox: When enabled, if the album is reaching its final recording and would typically restart, enabling this checkbox will redirect the caller to a "no route found" scenario within the branch instead.
- "Branch" drop-down: When you choose a branch from the dropdown menu while the "Escape" checkbox is selected, the system will route the caller to the selected branch instead of triggering the "no route found" scenario. Please note that you need to check the "escape" checkbox for this to be effective.
- "Album" drop-down: If you choose an album from this dropdown, the selected album will automatically play once the last recording in that album concludes. This takes precedence over any other selections in this section. In other words, it will play regardless of whether the "Escape" checkbox is activated and whether a branch is chosen from the dropdown menu.
- Other section - Additional Checkbox Options:
- Public: When selected, you can generate a public link for this album.
- Lock Album: When selected, the public link will restrict visitors to access only this specific album and prevent them from switching to different albums in your library. If not selected, visitors with access to the album link can view other albums under your account.
- Public Download: When selected, visitors of the public link will have the ability to download recordings.
Note: After creating an album, both its public and admin links will appear in the 'Public Albums' section of your Dashboard. To generate a new public link and disable the old one, click 'Actions' in the top right corner and select 'Regenerate Public Link.'
- App Access: if checked, your album will be accessible through the Voitex Podcast app, which is available on both Android and Apple app stores. Ensure that you reach out to support@voitex.com to enable the app option before selecting to make an album available in the app.
- Actions Button Drop-down:
- View All Albums: Click to display all your recordings, regardless of their associated album. This list will include each recording's corresponding album.
- View Trash: Select to access deleted recordings within the chosen album.
- Edit Mode: Select this mode to modify the displayed recordings' sort numbers and names.
- Delete Sort Range: Choose to delete in one go a range of recordings within your collection, specified by their sort numbers.
- Resort Batch: Use this feature to reorganize the sort numbers of recordings within your selected album after deleting portions of it.
- "From Beginning/Specific" radio-button: Choose 'Beginning' to begin sorting from the initial recording, or 'Specific' to commence sorting from a specified sort number (e.g., "10").
- "Up To End/Specific" radio-button: Choose 'End' to sort until the last recording or 'Specific' to sort up to a specific sort number.
-
"Order By" radio-button: Select how you'd like to order your recordings.
Auto Increment: Maintain recordings in their current order, filling gaps to ensure sequential sort numbers. It may adjust higher numbers to lower ones (e.g., changing 11 to 8).
From Filename: Sort recordings based on their filenames; for instance, a file named "1" will receive sort number 1.
Alphabetical Order: Arrange files alphabetically by their names, then assign sort numbers accordingly.
Date: Sort recordings by the date they were uploaded, followed by numbering them accordingly.
- Regenerate Public Link: Select this option to generate a new public link while deactivating the old one.
- Create Audio button: Choose how you'd like to add a recording to your album. Options include uploading a file, entering text that will be translated into audio, or recording directly from the portal.
- Upload Files:
- Select the album where the recording will be loaded.
- "Sort number" field: Enter the desired sort number for your recorded file. The system will provide the next available sort number in your album by default.
- "Same Sort Number" checkbox: If selected, all loaded recordings will share the same sort number. In the portal, they will appear as separate files, but for the caller, they will play consecutively when the single sort number is selected. If the checkbox isn't selected, choose the "Order By" radio-button options: "From filename" (follows the loaded file name, e.g., "5" = sort #5) or "Order by filename" (follows the alphabetical file name order of the loaded files).
- "Verify" radio-button: Select "Public" (default) to add the recording directly to the album. "Admin Verify" to publish the recording only after an admin reviews and approves it, and "Date" to select a date from which the recording will start playing.
- Click the appropriate upload button to load the recording file(s). Please note that the accepted file formats are .mp3 and .wav, with a maximum file size of 700MB and a limit of 100 files.
- Text to Speech (TTS):Enter the text you wish to convert into a recording and then click 'next'. Note that commas and periods indicate pauses and special characters are allowed. Unlike on the IVR branch where commas and special characters are not allowed.
- You can choose to override the file name automatically generated by the system or leave it as is.
- Select the album where you want to save the recording.
- You have the option to override the sort number or leave it as is.
- "Verify" radio-button: Select "Public" (default) to add the recording directly to the album. "Admin Verify" to publish the recording only after an admin reviews and approves it, and "Date" to select a date from which the recording will start playing.
- Before saving the file, you can listen to it and then click the "OK" button.
- 🆕Record Audio: Click the microphone icon and start recording. Once you're done, click the stop button and then proceed by clicking "Next."
- Select the album where you want to save the recording. You can choose a different album even if you started recording from a specific one.
- "Enter Sort Number" field: Enter your preferred sort number for the recorded file. By default, the system will suggest the next available sort number within your chosen album.
- "Verify" radio-button: Select "Public" (default) to add the recording directly to the album. "Admin Verify" to publish the recording only after an admin reviews and approves it, and "Date" to select a date from which the recording will start playing.
- Upload Files:
Phone System
In this section, you can view and edit your extensions (contact support@voitex.com to create extensions), and you can also create and manage your voicemails.
Extension
To edit an extension, click the pencil icon on the right and update the following fields:
- "Extension Number" Field: Replace the displayed extension number.
- "Extension Title" Field: Add a title for easy identification.
- "Forward Number" Field: Enter the forwarding phone number.
- "Enable Forward Number" Toggle Button: Toggle this option on to ring both the extension and forwarding number simultaneously, or keep it off for separate extension use in the Connect branch.
- "VM Group" Drop-down: Use this drop-down to select the voicemail associated with the extension. If no voicemail is chosen, calls will go to the general voicemail. Consider categorizing voicemails based on the inquiry type (e.g., Sales, Customer Services, etc.) by routing them to the appropriate mailbox using multiple Connect-Direct IVR branches.
- "DID" Drop-down: Choose the phone number displayed for calls made from this extension.
- 🆕Delete an Extension: You can delete an extension by clicking the trashcan icon to the right.
Voicemail
Create and manage your voicemails with these steps:
- Click the "+Add Voicemail Box" purple button in the top right corner to create a new mailbox.
- In the right side panel, provide the following information:
- Box title (Required): Enter the mailbox title.
- Minute duration: Voicemail length is unlimited by default, but you can set a limit by entering a minute duration.
- Choose your preferred voicemail notification method(s) by selecting one or more of the following options:
- "Email" Checkbox: Select this option and enter the email address to receive an email notification with the voicemail attached. You can specify multiple email addresses by clicking the "+Add Email Variable" button.
- "SMS" Checkbox: elect this option and enter the SMS-enabled phone number to receive an SMS notification without the voicemail file attached. If you wish your hotline to be SMS notified, ensure your hotline is SMS-enabled by clicking the chat icon to the right of the hotline number under your Dashboard.
- "Call:" Checkbox: Select this option to receive a phone call notification for voicemails, and the system will play back the voicemail recording.
- "Voicemail Greeting" radio button: Select whether the greeting will play from a branch or a voicemail box.
- Branch: If you choose "Branch," be sure to set the greeting in the respective branch separately. When a single box is used for various messages types, set separate greetings for specific message types and routes. For example, you can have a customer service greeting for those inquiries and another for different call types. To use a single greeting for the voicemail box in general, configure it here.
- VM (Voicemail) Box: If you prefer this option, you can select the greeting right on this page. Simply choose the appropriate album and the specific recording from the provided drop-down lists. If you want to use the default system voicemail greeting, leave the album and recording fields blank.
- 🆕"Message Review" checkbox: When selected, the system will play back the voicemail to the caller and give them the opportunity to confirm their recording before saving it or to record a new one.
- Voicemail Table: The voicemail table displays Caller ID, Caller Name, Timestamp, and other details of your voicemails.
- By default, the table shows voicemails from all voicemail boxes. To see voicemails from a specific box, click the "All" drop-down on the top right and select the desired box.
- To listen to a voicemail, click the play button
- To delete a voicemail, click the trashcan icon on the right
- To mark a voicemail as 'read,' click an entry (purple left sidebar turns lighter) and click again to toggle and mark it as 'unread'.
- To edit multiple voicemails at once, check the appropriate checkboxes and use the "Delete" or "Mark as Unread" bulk action button on the top right.
Merchant
In this module you can manage your pay-related options.
Select the right sub-menu option from the following to manage your payment preferences:
EZ TelePay | Recurring Payments | Merchant Keys
Reach out to support@voitex.com to learn about the advance sub-menu options Products, Orders, Customers, and Campaigns.
EZ TelePay
In this module, view transaction reports, set default payment settings, and manually charge cards.

- View payment details, search for specific phone transactions, and use filter fields with the 'Filter' button to refine results.
- View historical phone transaction details, including:
- Conf #: Confirmation number.
- Phone: The phone number the payee entered during the transaction call.
- Real CID: Caller ID the caller was calling from.
- Date: The date and time during which the payment attempt took place.
- Amount: The processed amount.
- Status: Indicates if the payment went through or not (x - declined, v - approved).
- Method: Describes how the payment took place, such as via phone, text (SMS), Auto Renewal (Recurring), and Web Link (through a payment site).
- Audio: If a message was recorded together with the payment call, you'll be able to play it here.
- Notes: You can write a free note to associate it with a specific pay entry.
- Last 4: The last 4 digits of a credit card number.
- Action: Click the trashcan icon to delete a transaction.
- Export payment entries based on the current view.
- To charge a card, click on the card icon and complete payment information, including phone, amount, credit card number, expiration date, CVV, and ZIP code.
- To set up recurring payments, click the "Auto Renewal" checkbox, select the recurring cadence (weekly/monthly) from the drop-down, specify the recurring amount, and click the "Charge" button to process the payment.
- Settings: Click the settings button in the top right corner to configure your payment settings, which include:
- "Ask For CVV" Checkbox: If selected, the caller will be required to enter CVV. This option is checked by default.
- "Ask For ZIP" Checkbox: If selected, the caller will be required to enter their ZIP code. This option is checked by default.
- "Require Recording" radio button: Choose one of the following options for call recording:
- Optional: Recording is available but not mandatory.
- Required: Callers must leave a recorded message.
- Not Required: Recording isn't available when this option is selected.
- "Email" Field: Enter the email address where you wish to receive notifications for every processed transaction.
- "Select Default Merchant Key" Dropdown: Choose the payment gateway for transaction processing. If you have multiple keys, use the main merchant key.
-
Note: This is also where you set the key for recurring payments since there's no direct option for it elsewhere.
-
Recurring Payments
View all recurring payment transactions, filter by transaction status (active/declined, etc.) using the status drop-down in the top right. You can also export transactions by clicking the export button and search for a specific transaction by entering a search term after clicking the magnifying glass.
Merchant Keys
On this page, you can create and view your merchant keys, which are required for processing payments.
To create a new key, click the "+Add Merchant" button at the top right and complete the required information as follows (all required except for Key 2):
- Name field: Enter a name for future reference.
- Select Payment Gateway drop-down: Choose the gateway associated with your payment processing account. Voitex is integrated with the following gateways:
- PayPal
- Stripe
- Cardknox
- USAePay
- Authorize.net
- Sequel Pay
- OJC
- Banquest
- Key 1 field: Paste the main merchant key generated through your payment processing account.
- Key 2 field: If applicable, paste the secondary payment key.
- Select Currency drop-down: Choose the currency for payment processing (ensure it's available under your payment processing account).
- Click "Save" to save your merchant key.
Note: Additional charges of $30 apply for every added merchant key (e.g., 2 keys will cost $60 monthly, etc.).
Live
- In this section, you can monitor your live calls, including various call details such as:
- Caller Number: The caller's name
- Caller ID: The caller's number
- Previous: The caller's previous branch in this call route
- Input: The caller's latest input
- Current: The caller's current branch number
- Title: The title of the caller's current branch
- Recording: The recording the caller is currently listening to
- Duration: How long the call has been active
- And more.
- If you have multiple hotline numbers, each number will have its own live call details displayed below it.
- To locate a specific live caller, simply click the search icon and enter the caller's information, such as their phone number, name, or any other relevant details.
If you wish to see the caller's contact name as saved in your Contacts database, select the label your caller is associated with under "Caller ID Display Label" in "Settings." If you wish to display caller names for all your contacts, you can create a label similar to "Caller Name" and assign it to all contacts. Then, choose this label under Settings to show caller names in the Live Calls dashboard.
Logs
Access logs for various modules in your account. Each log page allows you to filter by search terms and date range, as well as view, export data, and generate reports. The available columns for each log type are as follows:
| Call Logs |
|
| Branch Logs |
Note: To track a caller's route, sort the table by time and then by caller and view the caller's route within your hotline. |
| Album Logs |
|
| Recording Logs |
|
| Recording Hits |
Use this log type to gain insights into the popularity of a particular recording by checking the total number of listeners.
|
| Recording Likes | Access this report to discover which recordings received the most likes. The report provides details on each audio file, including the album it belongs to and the number of likes it received. |
| Schedule Logs | This is an advanced feature related to logs. Contact support@voitex.com for more information. |
| Conference Logs |
|
Note: 'Recording Logs' offer caller-specific details, while the 'Recording Hits' logs provide a general overview of total sessions per recording.
Settings
This page enables you to configure your general account settings. Please ensure you understand each setting before making any changes.

- General Settings section:
- Branch at Login: Choose where your account opens upon login—'Landing Box' (your designated call landing branch) or the 'Last Visited Box' (the IVR function you were last working on during your previous Voitex portal session).
- Call Landing Branch: Set the initial IVR function for incoming calls.
- SMS Landing Branch: Set the first SMS function for text interactions.
- Bookmark Album: Choose the library album for custom bookmark recordings. Leave it empty to use default system recordings.
- Bookmark Menu Audio: Select the greeting recording for the Bookmark Album.
- Bookmark Saved Audio: Choose the recording to play when bookmarks are saved.
- Default info album drop-down: If a caller presses '5' during a recording, the system offers various options (e.g., reset volume, increase volume). Alternatively, you can select a custom prerecorded audio file for this purpose.
- Caller ID Display Label: To display contact names in Voitex reports (Live, Logs, etc.), select a label from which the contact names will be sourced.
- "Block Private Caller" checkbox: Enable this option if you want to prevent private callers (those who block their caller ID) from calling your hotline.
- Default Temp Album: Choose the album for storing unsaved recordings due to call disconnection or missed prompts. For instance, if you record in a 'Public' branch and forget to save a recording using #3, it will be stored in the default temp album for later retrieval.
- Default Branch Settings section: You can configure these settings as defaults for all branches, although they can still be customized for specific branches. Please note that changes made here will only apply to newly created branches and won't affect previously configured ones. These settings include Repeat, Wait Seconds, If Valid, If No Route Found, and the default Branch to which it will route callers.
- EZ Telepay Recording section: Choose the album and audio recordings for each step of the payment call (e.g., Enter phone number, Enter the amount). Beneath each option, you can preview the default system recording that you will replace.
- Icons section:
- Alerts: Configure where and how you want to receive alerts. Enter your email address (or multiple addresses separated by commas) to receive alerts, and choose the notifications you want to receive by toggling the corresponding buttons:
- Daily Report: Receive a daily summary email detailing your callers and their listening activity, including the total number of calls, channels, and hits for each album.
- Auto Rotate Report: Receive an email notification each time an Auto Rotate IVR branch is rotated.
- Record Notifications: Receive an email notification each time a caller leaves a message in a record branch.
- Click 'Save' to save your notification preferences.
- Language: Manage and create languages for your account. This is an advanced feature. Contact support@voitex.com for more information.
- Time Slots: Use this page to manage your account's time slots, which can impact various modules. For example, in the Scheduled Broadcast module, you can exclude specific time slots (events like Yom Tov, Rosh Chodesh, etc.) when setting up broadcasts.
- You can view your previously created time slots (title, count, action) and search for specific ones.
- To create a new time slot, click the '+Add New' button on the top right, enter the title and dates. You can add additional dates to the time slot by clicking the 'Add a Day' button and selecting the desired date.
- To remove a date, click the 'x' button on the right. Don't forget to hit 'Save' to save the configured time slot.
- Google Sheet: This is an advance feature, reach out to support@voitex.com to learn more.
- Google Integration: This is an advance feature, reach out to support@voitex.com to learn more.
- Alerts: Configure where and how you want to receive alerts. Enter your email address (or multiple addresses separated by commas) to receive alerts, and choose the notifications you want to receive by toggling the corresponding buttons:
- Imports/Exports banner:
- Branch Import: Bulk import multiple branches by uploading a spreadsheet with details and specifications for Menu, Album Collection, and Switch Timer functions. Choose the branch type, upload the file, and click "import."
- Branch Export: Download IVR function details under a selected category (e.g., 'menu') to view your branch settings.
- Album Import: Bulk import albums (excluding recordings) by uploading a spreadsheet with details. Upload the file, and click "import."
- Album Export: Export album details and specifications in a single Excel sheet.
- Audio Export: Download audio specifications and details in an Excel sheet.
- Orders Export: For Orders users, download order details in Excel format. Contact support@voitex.com for more information.
- Custom Input Logs: View logs of custom input branch interactions, including contact phone numbers, call dates, branch details, and input. Filter by date and export as needed.
Additional Resources
Playback Options
| * | Go back to previous menu |
| # | Next recording |
| 0 | Previous recording |
| 1 | Rewind 15 seconds |
| 2 | Pause/Resume |
| 3 | Forward 15 seconds |
| 4 | Rewind 1 minute |
| 5 | Rewind 5 minutes |
| 6 | Forward 1 minute |
| 8 |
|
| 9 | Forward 5 minutes |
| 25 | Play how long recording is |
| 50 | Enter Admin pin and delete recording (set admin pin in the album first) |
| 51 | Lower volume |
| 52 | Reset volume |
| 53 | Increase volume |
| 54 | Delete recording (only if the album’s settings has ‘allow delete’ set to 'on') |
| 55 | Like a recording |
| 56 | Play amount of likes |
| 57 | Skip recordings until the next date (not enabled by default, contact for details) |
| 58 | Skips 10 recordings (not enabled by default, contact for details) |
FAQs - Frequently Asked Questions

-
Q: Can I add users to my account, and can their access be customized?
A: Yes, you can create new users under your Account Management page and customize their access. Please keep in mind that for your sub-users to access any portal module, you must configure their permissions in the Set Page Permissions box accordingly.
-
Q: Why can't I find my album links on the dashboard?
A: If you can't view your albums on the dashboard, please ensure they're set to 'Public.' To do this, go to your Library, select the desired album, click the edit pencil icon, and in the 'Other' section at the bottom right, check the 'Public' checkbox.
-
Q: How can I add a recording to an IVR branch?
A: You can add a recording by either selecting a pre-recorded album from your Library or using TTS (Text-to-Speech) by entering the text you wish to convert to audio.
-
Q: Which type of IVR branch requires a greeting recording?
A: Several IVR Functions, including those labeled as 'Multiple,' require a greeting recording. These functions include Menu, Password, Custom Input, and Multiple function types (such as Album Collection, Add Label, Connect, etc.).
-
Q: What happens if callers enter invalid input during their call route?
A: The response depends on the IVR branch settings they are on. You can configure it to make callers Go Back to the beginning of the branch, Play a recording to provide further instructions, or Goto a different branch in your account.
-
Q: How can I set a specific IVR branch as the first one for callers when they call my hotline?
A: Under Settings, set your Call Landing Branch from the IVR drop-down. The selected branch will be the first one callers land on when they call in. Most accounts choose Menu as the default landing branch, but you can customize this based on your needs.
-
Q: What's the difference between the 'Record' and 'Voicemail' IVR functions?
A: 'Record' automatically adds content to albums, while 'Voicemail' is designed for admin listening with additional features. Voicemail-to-album requires manual download and upload.
-
Q: For the Menu IVR function, can I use any input number I'd like?
A: It's recommended to use single-digit input whenever possible with the Menu function. Using multiple digits may lead to the system expecting additional input, potentially causing delays.
-
Q: Can I route groups of callers through different call paths?
A: Yes, you can achieve this by utilizing the Label function. It allows you to send different contact groups through various call routes.
-
Q: What's the difference between the 'Connect' and 'Transfer to Number' IVR functions?
A: The 'Transfer to Number' option is intended for transferring calls to another hotline within the Voitex organization, whereas the 'Connect' function allows for transferring calls to non-Voitex numbers.
-
Q: Where can I access logs for custom input from callers?
A: To access Custom Input Logs, go to Settings, then select 'Custom Input Logs' on the right. Choose the desired log date to view the logs directly, or to export them in CSV format, click the export icon on the right.
-
Q: Can customers send SMS messages to my hotline number?
A: Yes, to enable your hotline to receive SMS messages, activate the SMS branch and ensure your hotline number is SMS-enabled. You can do this by clicking the chat icon located on the right of your hotline number in the dashboard. Additionally, select the SMS landing branch from the 'Settings' dropdown after creating an SMS branch. Unlike IVR, SMS doesn't have a default landing branch.
-
Q: I'm trying to set up a broadcast, but it won't allow me to. What am I doing wrong?
A: To initiate a broadcast, you need to have a minimum credit balance of $50 available. To add credit, simply click the "+Add" button located to the right of your Credit balance.
-
Q: Can I schedule a recurring broadcast?
A: Yes, you can schedule a recurring broadcast. Click on the timer icon within the Broadcast module and set it up with the same settings as when creating a regular broadcast. You will also find additional options for specifying the repeating schedule (Daily/Weekly/Monthly, etc.) to suit your needs.
-
Q: How can I monitor and manage conference rooms in real time?
A: To monitor and manage conference rooms in real time, navigate to the 'Live Conference' section. Here, you can view your live (active) conference room(s) and directly manage them as needed.
Voitex Policies
Ensuring a smooth and efficient experience for our valued clients is of utmost importance to us at Voitex. We take pride in delivering unparalleled service and maintaining the highest standards. To continue offering this level of service, we kindly request our clients to respect our policies.
- Primary Point of Contact: To optimize the functionality of our system, we suggest that every customer on a plan of $50 or more designates a portal administrator responsible for all portal-related management tasks. This individual should have computer skills and be prepared to learn the Voitex system effectively. Voitex is committed to providing training for one administrator per account. If you wish to train an additional individual, an additional fee of $150 will apply.
- We recommend a single account admin to avoid setup requests conflicts and errors.
- Training & Setup Fee: Every account setup includes a complimentary 1-hour training session. You have the option to use this hour for a one-time setup by a Voitex expert. Any additional training or setup beyond the initial hour will incur a charge of $150 per hour.
- Please note there is a one-hour minimum charge. To maximize this hour, we recommend providing a list of tasks in advance, as unused time cannot be credited. Additionally, the hour of service should be used in a single session, rather than spread across multiple days.
- Billing Terms: We operate on a month-to-month billing cycle, with charges due on the first day of each month for the upcoming month. To close your account and avoid being billed for the following month, please notify us before the first of the next month.
- Account Suspension: To ensure uninterrupted service, Voitex will automatically bill your card on file every 1st of the month. If the initial charge attempt fails, additional attempts will be made until the 7th. If your card on file is missing or declined by the 7th, your account will be suspended on the 12th of the month. To avoid suspension, add a valid payment method, process the payment manually by the 12th, and enable automatic charging for future payments. Failure to pay by the 1st of the following month will result in hotline number loss and a $100 reactivation fee to reinstate your account.
- Account Change Notifications: For security purposes, please send an email from your primary address on file to request any of the following account actions: closure, upgrade, or downgrade.
- Account Closure: Once you proceed to close your account, we cannot guarantee the preservation of your account setup beyond 6 months.
- TTS Feature Limit: Please note that TTS feature usage is limited to [insert amount] per month. Exceeding this amount may result in an additional fee.
Thank you for your understanding and cooperation in maintaining our high service standards. Your trust in Voitex is greatly appreciated, and we are committed to ensuring your experience remains exceptional. If you have any additional questions or require further assistance, please do not hesitate to reach out to us at support@voitex.com.
SMS Pricing - Outgoing Messages
Broadcast
| Per Minute Plan | Unlimited Plan* |
|
Both calls and SMS are included with this plan. |
Standard Pricing
| Price | Included phone numbers count |
| $5 | 20 |
| $15 | 70 |
| $30 | 150 |
| $55 | 300 |
| $40 | 200 |
*Unlimited Plan Terms:
- The Unlimited plan requires a minimum 3-month commitment. Downgrading to a per-minute plan before the end of the 3-month period isn't an option.
- SMS messages have a character limit of 160.
- You must send messages to the same phone numbers included in your plan. For example, if you pay for 20 phone numbers, you must send messages to those same 20 phone numbers every time.